
Abstract Nature : Personal Project 1
Abstract Nature/ What is abstraction?
Abstract photography which is also known as non-objective which means depicting a visual image which does not have immediate association with the object. To create a abstract image you need to start with a everyday object and use their features to make it seem as something else. Abstract photography is a way to express your creative vision and to open your eyes to things you never noticed before.


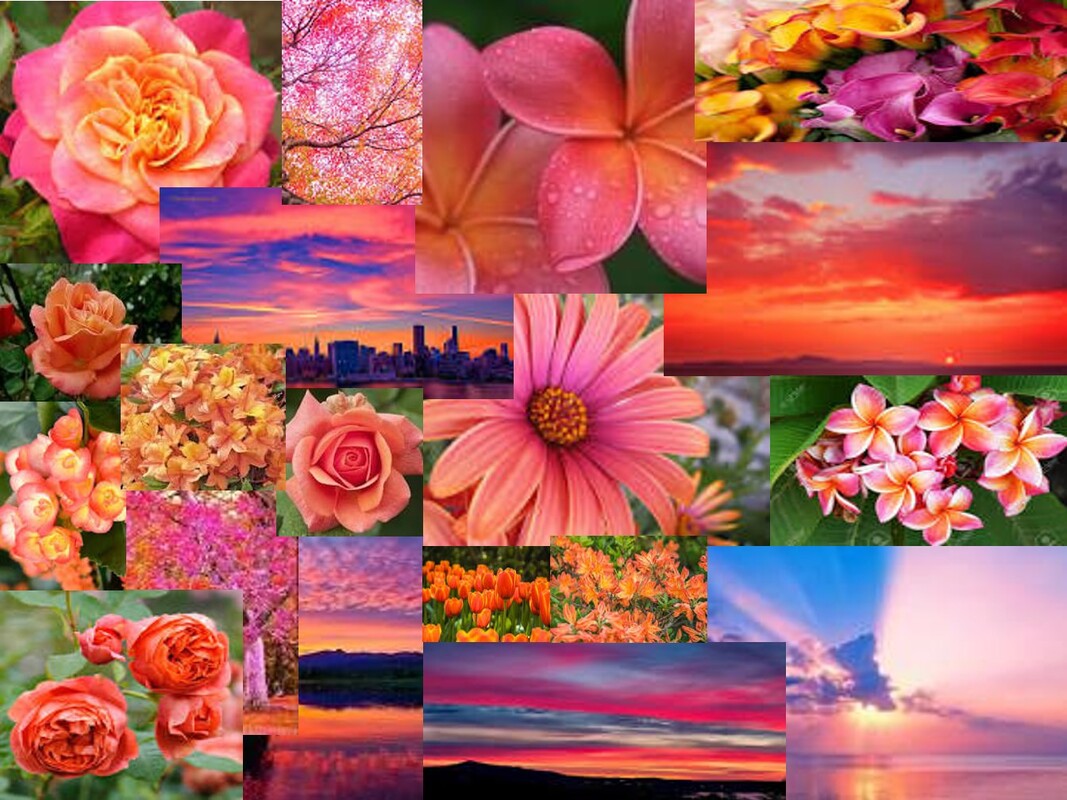
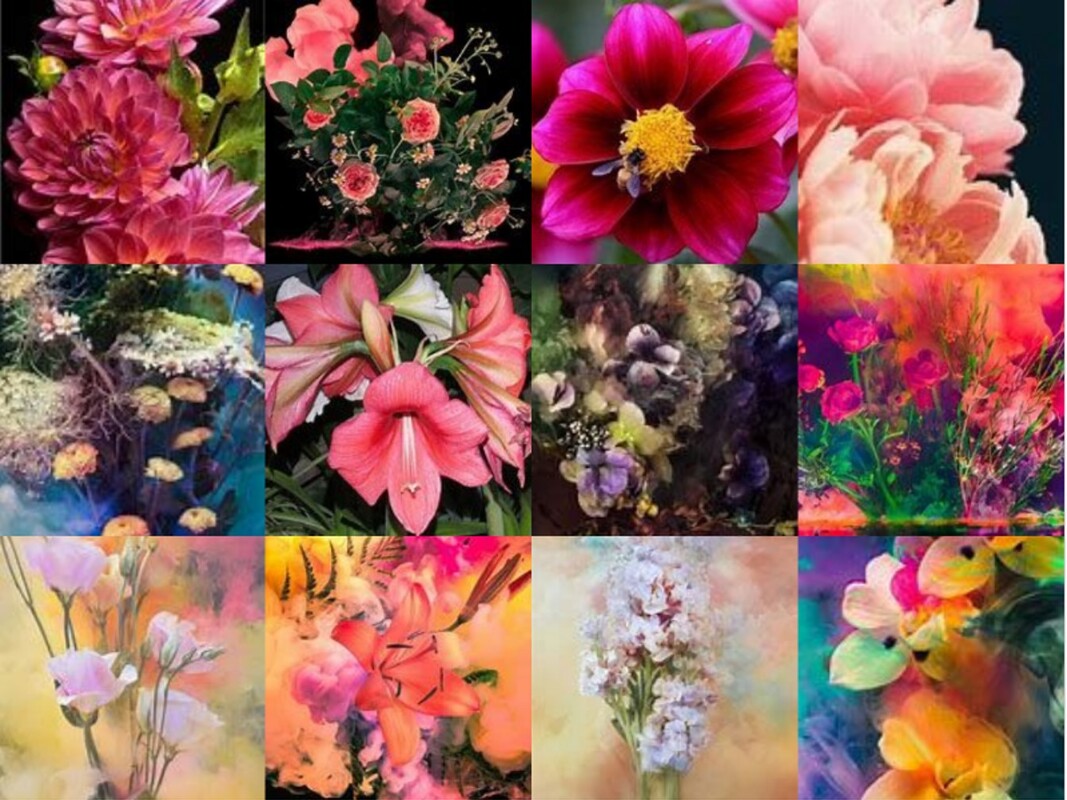
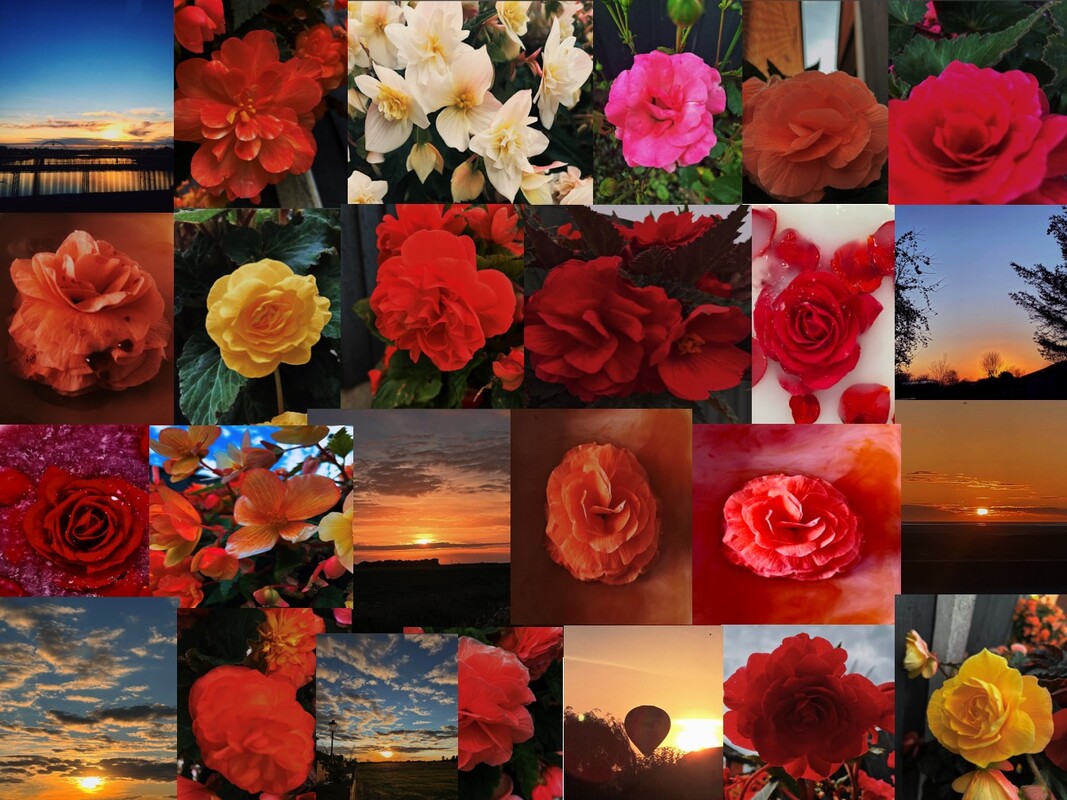
Abstract Nature: investigation of abstract photography techniques.
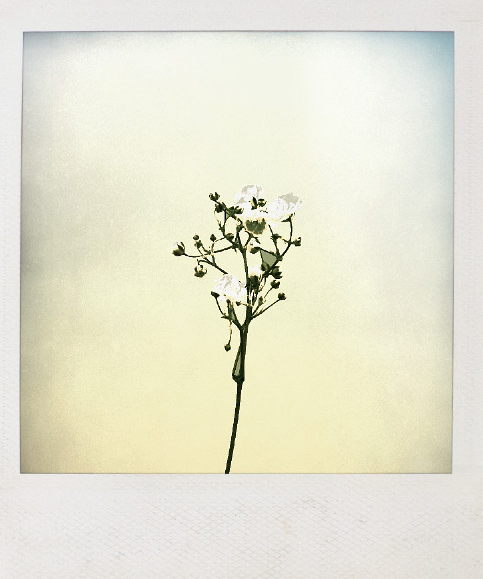
ICM shoot


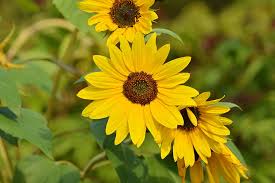
In the ICM (intentional camera movement) shoot it presents the flower as artistic blur. I did this by moving the camera side to side a rotating the Lense at the same time to create a circle effect and moves the lines and colors to create an abstract picture meaning you are unable to identify the original state of the photograph. During this shoot I used the Canon 250D camera and used the 18-55mm DC lens and had a shutter speed of 1/4000 to 30 seconds. In the shoot I used natural lighting, the weather was also bright and sunny so there would not have been darkness or anything affecting the lighting or presentation of the flowers and I tried to get as close to the camera as possible without completely taking the objects out of focus. This is how I was able to create an abstract ICM shoot using my camera. My strengths in this shoot were how the colors were complementary and blended after using the spiral technique. Also, because it was a plain white background it blurred the color but kept the background in focus. Finally, I believe my weakness was how many pictures all looked the same so next time I think I need to find a way to make my pictures different.

|

|

|

|

|

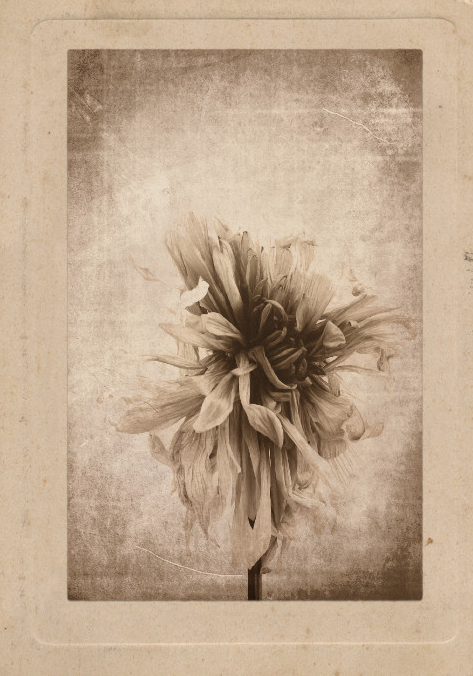
Monochromatic shoot


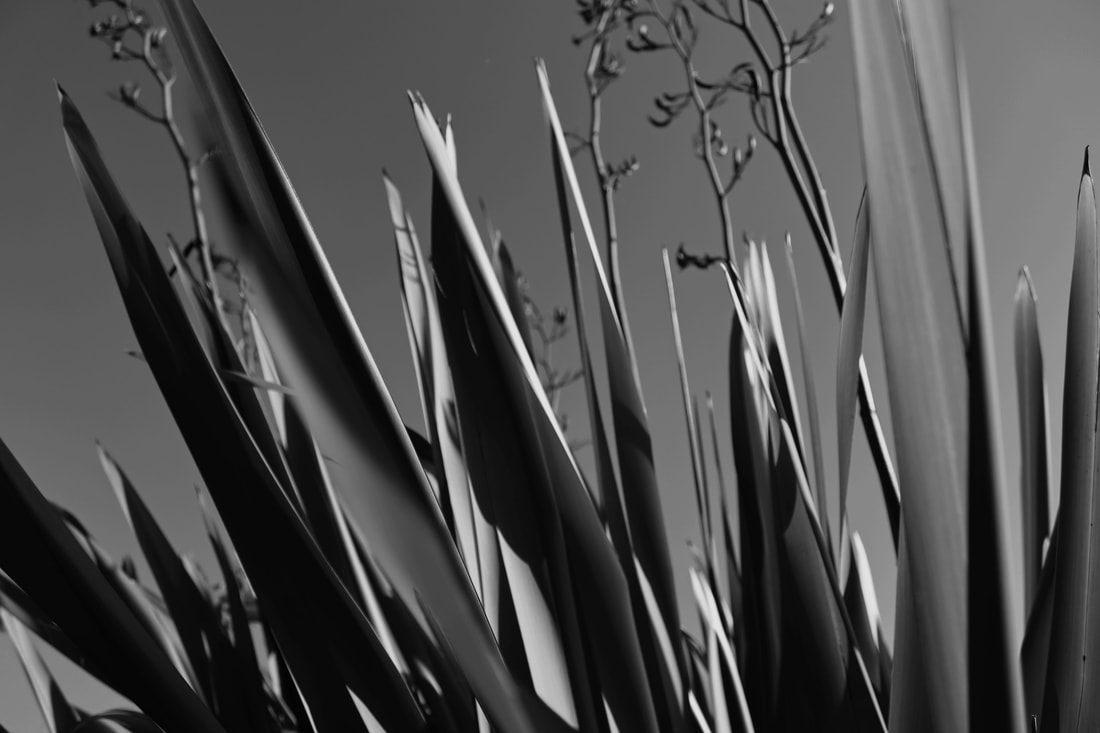
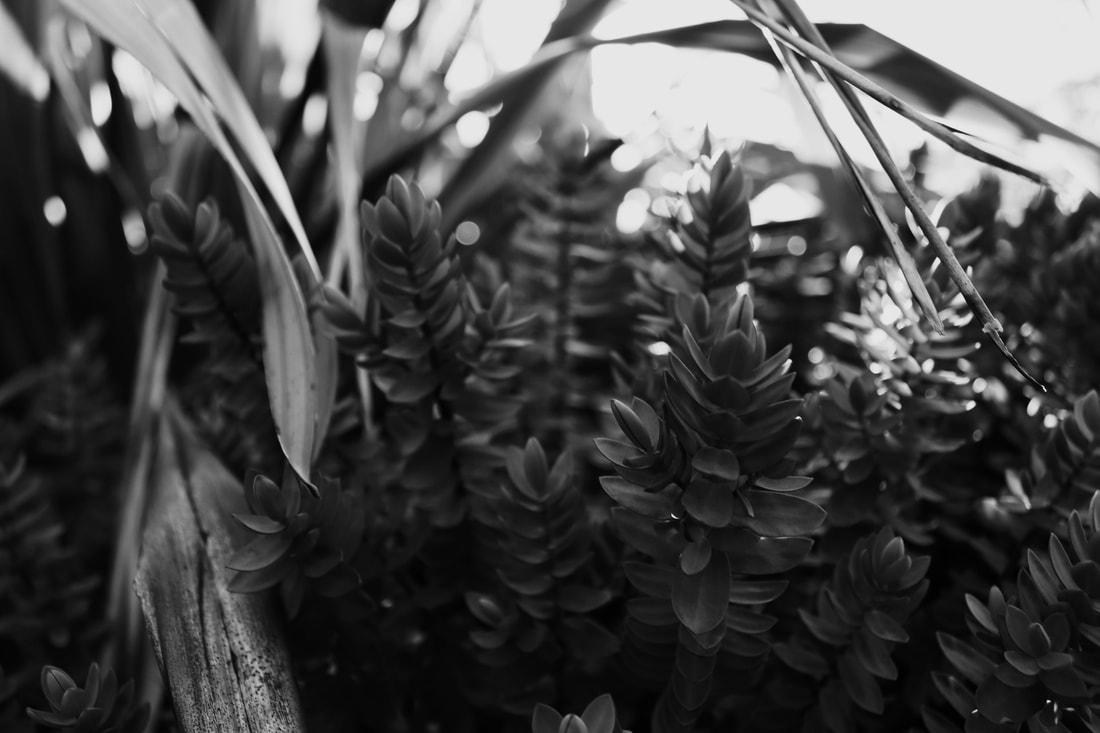
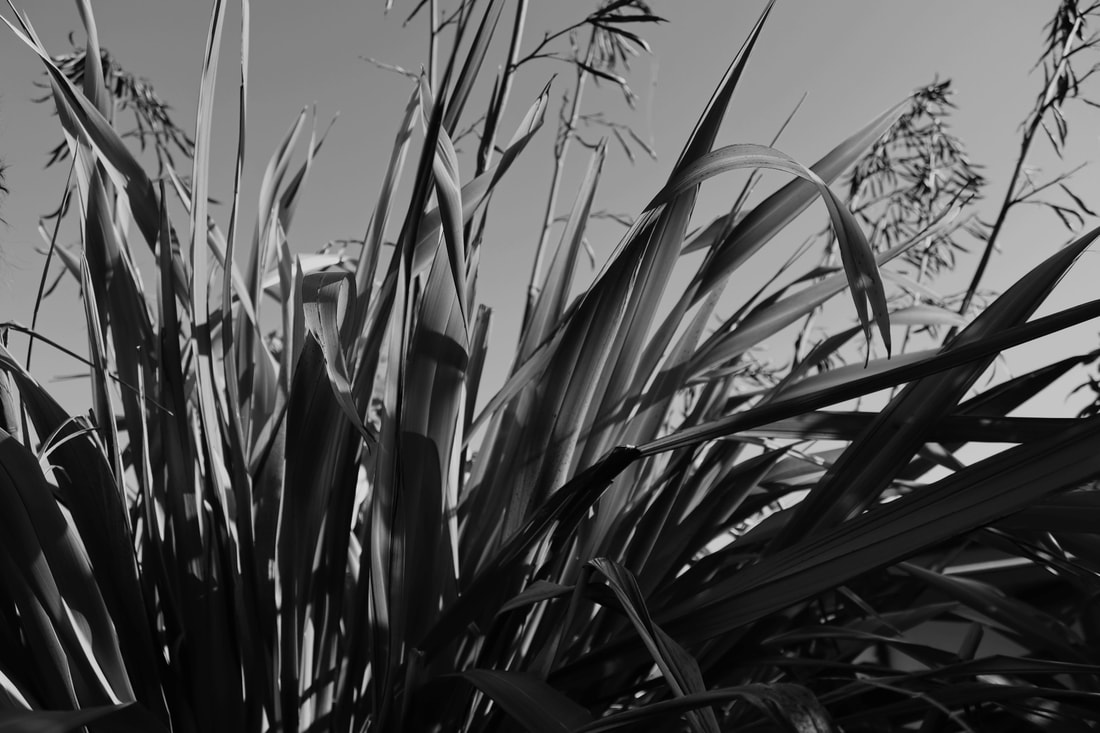
By shooting in black and white it gives you many advantages such as taking the element of colour away it will make you pay attention to the textures and the tone of these objects. During the shoot I made sure to get different distances between the Lense to get different angles. During this shoot I used my canon 250D and used the monochromatic (black and white) setting. Many of these photos were taken with busy backgrounds so it didn’t prioritize the detail in each object. Furthermore, lighting had a big role in the outcome because that is what separates black and white. Finally, I believe my strengths were the positioning and the way I made the objects stand out. Also, the textures were presented extremely well because of the contrast between the sharp corners and textures inside of the plant. Additionally, I think I could improve next time by choosing a day with more sun so the images may turn out brighter.

|

|

|

Best images:

|
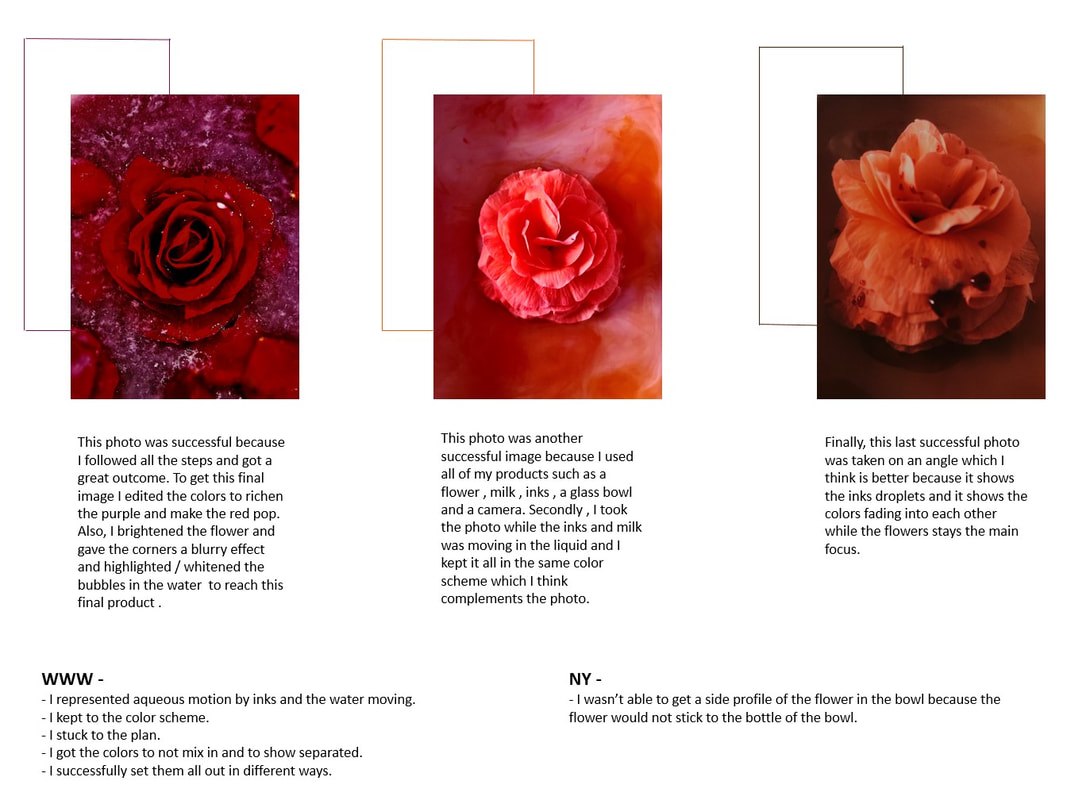
I have chosen this image because the contrasts between light and dark really stand out in this photo by the use of sun light and shadows. My strengths are positioning the camera so it keeps the main leaf in focus and blurs the background. Additionally, for my post shoot editing I used exposure to decrease the lighting to proper contrast the image. In this shoot I used my canon 250D camera with my 18mm to 50mm lens to capture the clearest view of the plant. The lighting of the camera was all natural sunlight so their was no artificial lighting and on the day it was bright and sunny so their would have been so affect to the image quality.
|
|
I have chosen this image because I believe the camera was positioned perfectly to get the sharpness of the edges and the textures in the image. My strengths are how I shot it at an angle lower down to really give the image a fuller affect and to not have the image with little in it. I have used exposure to bring out the contrast in this image and again I have used the canon 250D with the 18mm to 50mm lens. Next time I will shoot from a side ways to get more of the sharpness around the sides and the bottom.
|
|
I have chosen this image because the features in here such as line, texture, tone which is three of the seven elements of art. Texture is a main one in here because their is many different types they all blend together well. Additionally, the lightning in this is using natural sunlight and luckily on the day of the shoot it was alright day so this did not affect the final product. Furthermore, I used agin the canon 250D and the 18mm to 50mm lens to create this image. My strengths in the picture is that I got close up to the plant and took the picture from the ground so I could get all the textures and tones.
|
|
I chose this final image because it is more zoomed out than the second image and has more going on so it looks more completed. I used the curve editor to keep the black and white but add more light into the image. If I did this shoot again I would get more closer to the plant so the I would be able to edit and enhance the textures more and I would try to bring the shallow depth of field down so I will be able to blur the image and make the textures come through more.
|
Shallow depth of field shoot.


The shallow depth of field shoot I did is abstract photography because it has blurred the background so you can not fully identify what it is. This means the photographer is able to move your focus straight to the flower/leaf and the details of the object. I believe the closer you get to the image the better the outcome and closer you get the more abstract it is .For this shoot I used my canon 250D camera and the 18-55mm lens.I used F 3.5 which is the most my camera goes and with that I was able to achieve these images above. During this shoot I faced some problems such as the lighting as the sun was going down so the natural lighting decreased. Even though I had a disadvantage I do believe the final product was not affected. Finally, my advantages were that all my photos are clear and even though the background is blurred , you can still see the background and all my flowers are bright, colourful and have a lot of texture which are two of the seven elements of art. Additionally, my disadvantages were the photos were not as blurred as I planned them to be so next time I will find away to emphasise the blur more.

|

|
|

Artist Investigation / Edward Weston
Very often people looking at my pictures say, 'You must have had to wait a long time to get that cloud just right (or that shadow, or the light).' As a matter of fact, I almost never wait, that is, unless I can see that the thing will be right in a few minutes. But if I must wait an hour for the shadow to move, or the light to change, or the cow to graze in the other direction, then I put up my camera and go on, knowing that I am likely to find three subjects just as good in the same hour.
Why this quote?
I chose this quote because it represents the idea of not everything is how it seems and sometimes the best things are right in front of you meaning sometimes it might not look good to the eye but the camera could pick something special up. Below are a selection of 10 Weston images that I find inspirational to me because throughout his life time he has stuck to the same theme and idea which creates the perfect portfolio and flows really well. |
Why this artist?
To begin my Abstract Nature Artist investigations, I will initially study the work of Edward Weston because her used old techniques and old camera but still got this beautiful outcome. The black and white feature of this image brings out the textures and tones. He also was a perfectionist so he did multiple attempts of exposing the image to get the perfect one. Who is he? Edward Weston was born in Illinois on the 24th of march 1886 and he was known for being "one of the most innovated and influential American photographers" He was known for his unique way of using everyday objects and turning them into abstract art. Why this video? I chose this video because it is what I believe is his best images and the most inspirational because they all mostly using everyday objects so it is easy to find abstract photography anywhere. The rest of the photos in the video are nature which links very well into the rest of my work above. |


Semi Analysis / Edward Weston

|
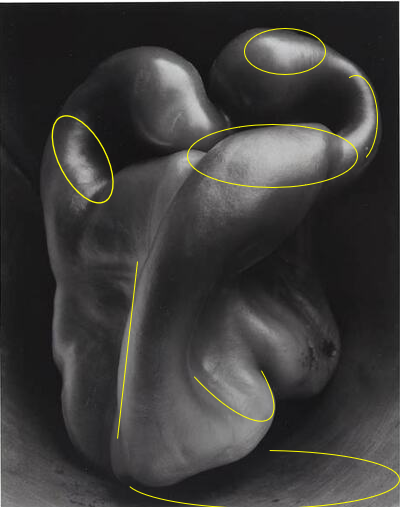
The photographer of this image is called Edward Weston. The title of this photograph is Pepper No. 30 and was creates in 1930 and this is his most famous work because of the strong illuminations from above and the rich black and white tones. The genre of this photograph is a portraiture because of the bell pepper being the main focus and having a plain background helps with that. Additionally, I do think it is also a still life because of how the bell is positioned. The props I can see in this picture is a single pepper which has been deprived of colour so they have used different black and white tones. The props in this photo is a green pepper which exposed and turned black and white and used his 8 x 10 camera. The composition in the photo shows the pepper position in the centre as the focus in the image.
However I do believe the rule of thirds have been used in this image because of how the tones change from each third. The views eyes is lead around the photo because of the composition and perspective Edward Weston has used. The perspective that Edward Weston has taken the photo from is just above eye level I know this because you can see the top of the pepper and all its textures. The photographer employs a range of visual elements in his work . The most striking elements are how the element of colour is been taken away so the different tones of black and grey have been shown and because of how dark the pepper is ,the light rays has been shown. The photo has been taken from a short distance so every line and shape has made the image more abstract. This has been taken using studio lights and he has used artificial light placed around the pepper to focus on the main focal points. The light source is placed above which is highlighting the top which is shadowing underneath. To emulate this photograph myself I would use my Canon 250D with a 15mm-50mm Lense and I would look into Edward Weston's best techniques and apply them to my work. I feel like the photo conveys a message of how anything in ordinary life can be turned into abstract photography. It does this by the line and shadowing forming together. |
Technical processes / low key photography

|
Low key photography challenges the photographer because of its range of shooters. Low key photography is where you use a black backdrop and make the object the only focus in the picture by shining a light on it and zooming in to get the details and using a slow shutter speed to achieve all of this. This picture is an example of where low key photography has the ability to hold and add drama and hard hitting emotions within a shot. Low key photography are underlit images that feature dramatic contrast and colours. Other words that describe low key photography is quiet , restrained , moderate and easy going which I think sum up this image.
|
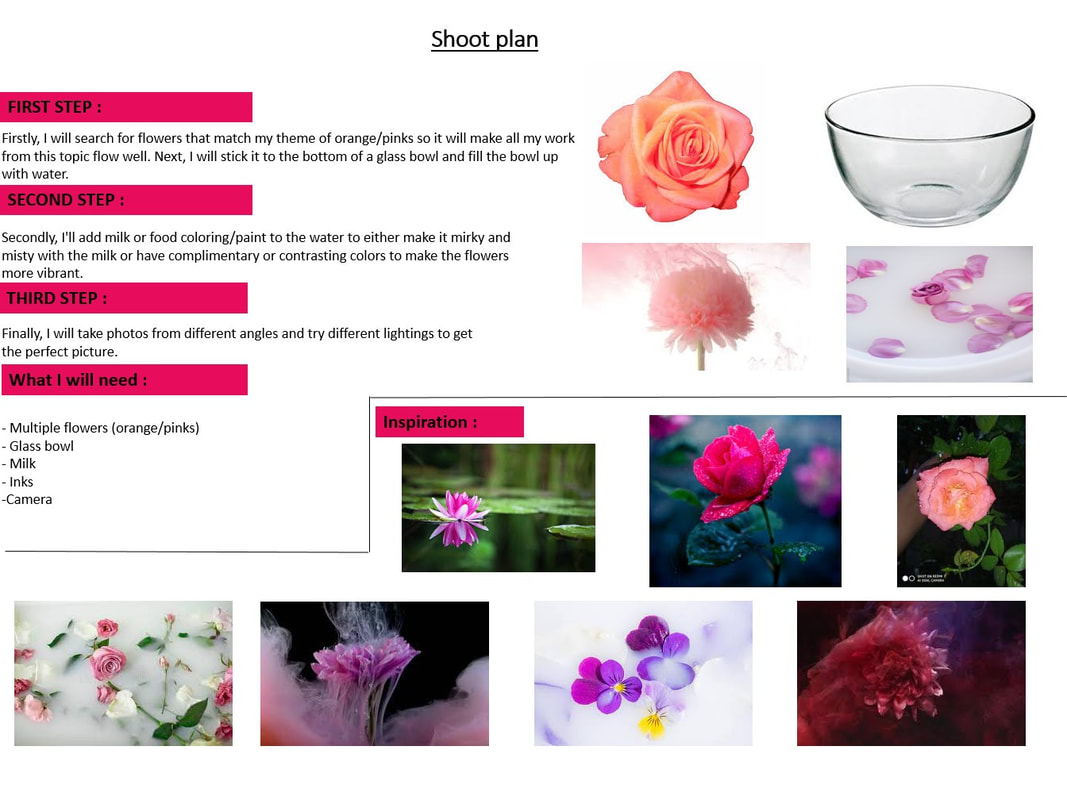
Shoot plan / Edward Weston


|
My inspiration for this shoot came from Edward Weston because of his outstanding work which has influenced multiple generations of photographers with his artistic ways that were modern for his time. The reason he started photography was because he was inspired by the elegancy simplicity of Brancusi's sculpture and his love for music. I will do my shoot at the start of the day in a room will multiple windows so the natural sunlight can be directed through to the plant. The only consideration I need to take into account is where I place the vegetable. I believe by placing the vegetable higher I will be able to get all the details up close which will make my picture more like Edwards Weston's. In this shoot I will be using a plain black back drop and black paper at the bottom of the vegetable because then the vegetable will be the main focus and will contrast to the black paper. In this shoot I will be using a plain black back drop and black paper at the bottom of the vegetable because then the vegetable will be the main focus and will contrast to the black paper. In this shoot I will need little to no natural light in the room and I will only use white artalifial light to show the textures on the vegetable and the light reflects on the shape and creates a shadow next to it. Finally, for this shoot I used my canon 250D and my 15mm-50mm Lense and used the settings F/4 and I had a 1/100 shutter speed with an iso of 3200 to be able to capture the amazing images to duplicate Edward Westons work
|
Contact sheet/ Edward Weston

Editing Process Low Key Photography / Edward Weston
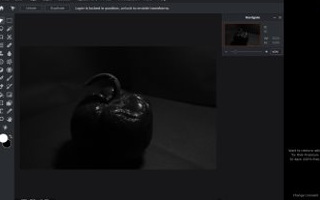
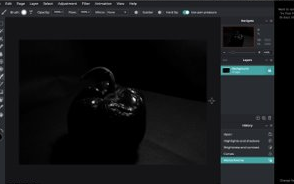
Step 1: firstly , I opened PIXLR-R and I selected my first image from my Edward Weston shoot.
|
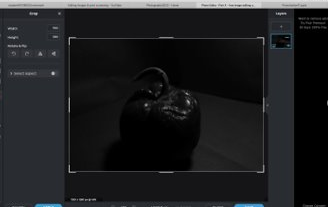
Step 2: Secondly, I cropped my image to the right size to make my pepper the focus of the image.
|
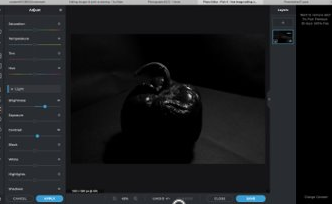
Step 3: Next, I adjusted the brightness and contrast to lighten up the object but darken the surroundings.
|
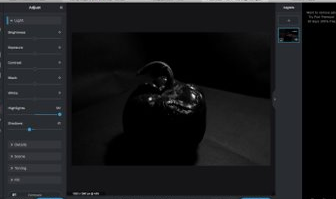
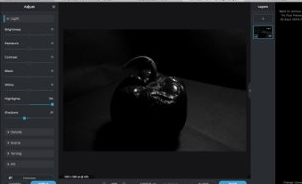
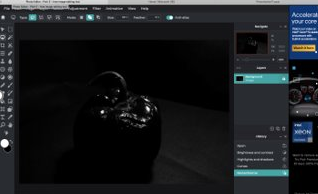
Step 4: furthermore, turn the highlights up a lot which works well with the brightness and turn the shadows down slightly to create a shadow effect.
|
Step 5 :I added a monochromatic effect on top of the photo to add extra contrast in case some coloured light seemed through.
|
Step 6: I added the curve filter which really shows the contrast between light and dark
|
Step 7: furthermore, I exposed the image which brightened the final product up.
|
Step 8: This is the final product at the end of all my editing.
|

|
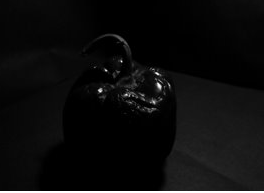
I have chosen this image because I believe the artificial light has shone in the perfect way that shows all the details and contrasts against the background. In this photograph it shows the element of texture which is one of the seven elements of photography. it shows texture where the light starts which is essential to Edward Westons work. Furthermore, the post processes editing that has happened here is the contrast has been raised and a touch of cropping to the image which will make the vegetable the centre of the photograph. However, I did increase the sharpness in my image to sharpen the tones and patterns. To achieve this image I used white artificial light at a 90 degree angle to light perfectly light up one side and leave the other half in darkness. I also use low key photography as I used a slow shutter speed and the image is under-lit.
|

|
The strengths of this image is how the image shows all the patterns but blurs the background and keeps all the lines the main focus which I think is a great example of abstract photography. The post process editing I used was brightening make sure the vegetable was in the main focus. However, I used low levels to make the vegetable more grey than white as there is not as much artificial light on it. Additionally, I under exposed this image to keep the dark and low light theme. A key feature to this image is the element of line, it is used quite a lot which shows how detailed it is. This has been achievable by the canon 250D and using a 18mm-50mm Lense which allowed me to access all the features and details of this vegetable. Finally, angle of the light is coming from below to show the brightness fading throughout the image. on the other hand, next time I will make sure the vegetable is stood up properly so everything will be in line and all perfectly placed. I also used low key photography to define the image to emulate Edward Westons work.
|

|
My strengths of this image is that you are able to see the whole vegetable outline and the light is shone perfectly to the side. Also because of how the light shines your eyes automatically goes to the side with a lot of texture. In this image the post process editing I have used is I cropped the image so it would be the main focal point. Additionally, I over exposed the image so the darker side would not be as dark so you can still be able to see the details, and also I over exposed it by making the curves higher to whiten the lighting. I used my canon 250D to achieve this photo and used the monochrome effect on the camera so I did not need to do this post shoot. The Lense that I used was a 18mm to a 50mm which gave me he opportunity to achieve this zoomed I photograph. The use of low key photography has made my vegetable the main focus of the image and made the image look quiet.
|

|
My strengths are even though it is dark you can clearly make out it is a pepper by its shape and the details shown by the light on top. Furthermore, the shadow blends in with the pepper which shows the pepper as very abstract. The post process editing I did was cropping to make it centred and lowered the exposure and brightness to make it darker. I got the shadow effect by turning the darkness and shadowing to the same. I used a lot of editing trying to match Edwards Weston's Pepper number 30 and create the same effect he has set out for years. Finally, I have used my canon 250D and a slighter more zoomed in angle to achieve this. I have also used low key by the quietness of this photo and how dark and detailed this photograph comes across.
|
Abstract through Cyanotypes/Anna Atkins

Do modern artists still use it today?
Cyanotypes are still used today as an alternative printing method. However , during the 20th century , as photography and technology advanced , the techniques became out of date and old fashioned. Advantages and disadvantages of cyanotypes? Additionally, cyanotypes have many advantages such as it is easy to do and it is very cheap so it is available to everyone, also to do this project you need the sunlight or UV light to expose the photograph so no darkroom is needed. On the other hand the disadvantages are the sensitizer is often not well absorbed by the paper and some tend to lie on the surface and it can cause tackiness which will not give the best outcome possible. Also, some yellow may occur due to over exposed PH solution. |
Who was Anna Atkins?
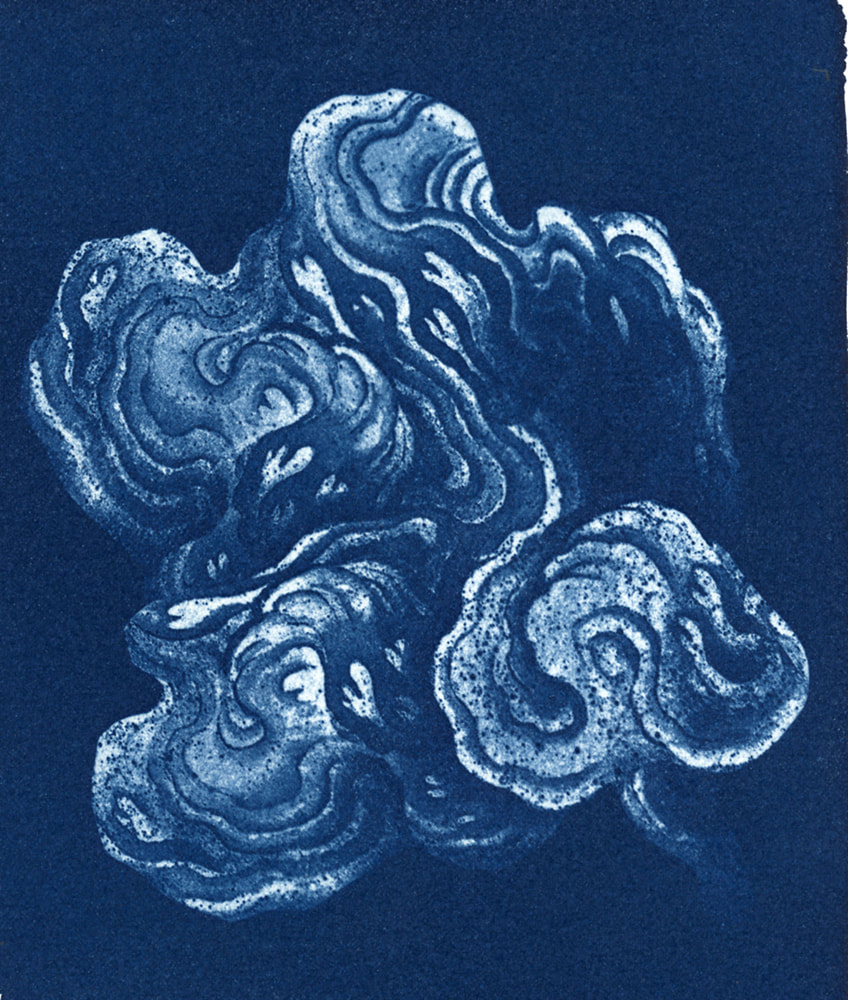
Anna Atkins was an English botanic artist in the 19th century and was born on the 16th of march 1799 in Kent England and lived their till she passed on the 9th of June 1871. Furthermore, she was the first person to illustrate a book with photographic images. What are Cyanotypes? Cyanotype is a 170 year old photographic printing process that produces prints in a distinctive dark greenish-blue. Additionally, they had to be carful with this method even though it is not toxic it can irritate the skin so their is always a caution when doing this. I have chosen the images to the right because of their their contrast in colours due to the blues and whites and the way the it was made by cyanotypes and not a camera or paintbrush. Additionally, these pictures are leaned towards being abstract due to the abstracts nature. In these photographs they are not using the modern techniques of a camera they are using old fashioned techniques which works out to be better due to the level of detail the Cyanotypes goes into. The first image relates to Anna Atkins due to they have the same subject and wants the same outcome. The last one looks like it uses natural form to create an abstract outcome/ photograph. |
|


My Cyanotypes

|
In the lesson I used acetate onto of paper and created a design or just painted in a square then you put a leaf or multiple leaves that you think will set the best pattern. Next, you put it in a box with artificial light shining straight onto it which will bring out the negatives in the image. Finally, you take the leaves off the acetone and soak it in water to make the negatives more vibrant then leave it to dry. I believe the most successful cyanotype was the one with the leaf then three smaller leafs going around the side. I believe it was the best one because the detail in the big leaf because the negatives really came through and left this image looking completely clean and well presented. If I did this again I would like to make the sheet of paper bigger to overall expand the negative and make it a much in detail abstract cynotype.
|
Abstractions through photograms / Man Ray
|
Who was Man Ray?
Man Ray was an artist of enormous international standing , who worked in many media including photography. Man Ray was an American visual artist who spent most of his career in France. Man Ray was a leading figure in the European and American in the 1920s-1930s. He pushed the boundaries of each medium he used , investing techniques that revolutionized photography , film and paintings. What are Photograms? A photogram is a shadow like photographic image made on paper without the use of a negative or a camera. It is made by placing objects between light-sensitive paper or film and a light source. Photograms are a way photographers were able to take pictures without the modern day camera. A photogram is a photograph made without a camera or a lens by placing an object or objects on top of a piece of paper or film coated with light sensory materials and then exposing the paper or film to light. What are the advantages and disadvantages? An advantage of photograms are that it allows us to capture the patterned interplay of light on a sheet of sensitised paper without recourse to any apparatus. On the other hand, a disadvantage is that sometimes they might not absorb properly and will not come out with the best outcome due to the chemicals or water used. |


|
|
Horst P Horst / Rotational Symmetry


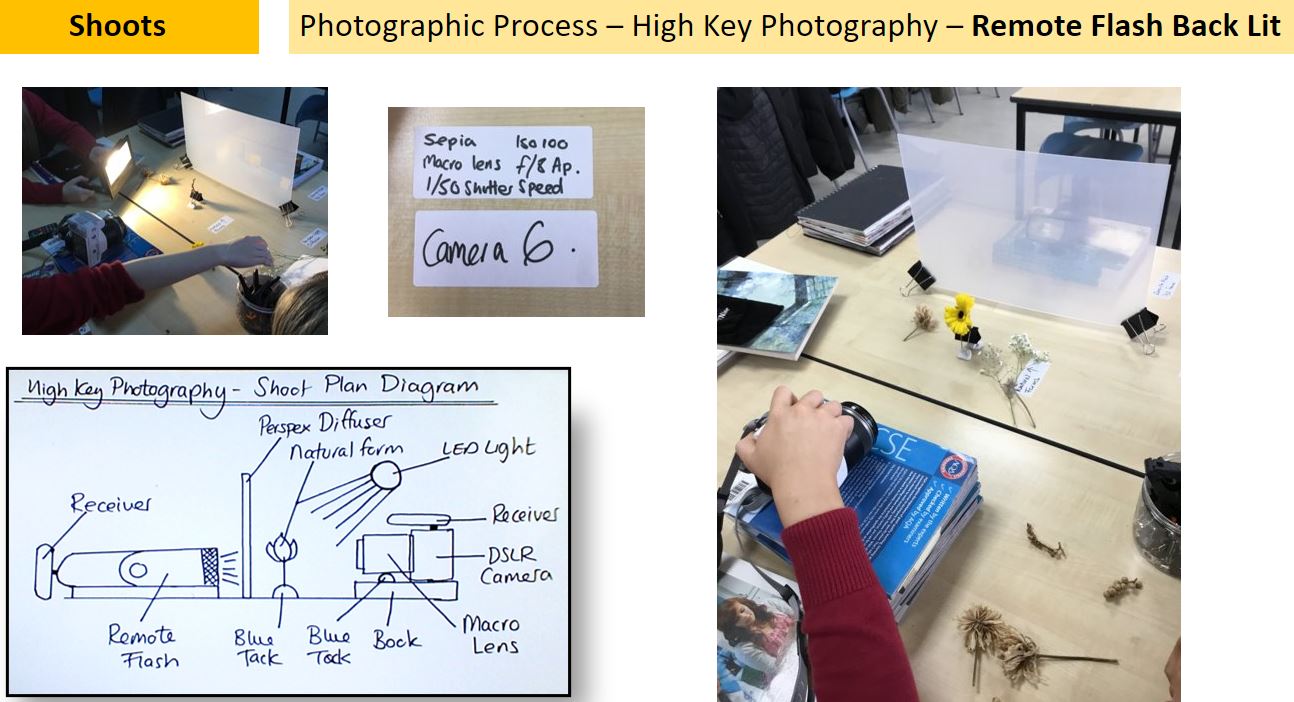
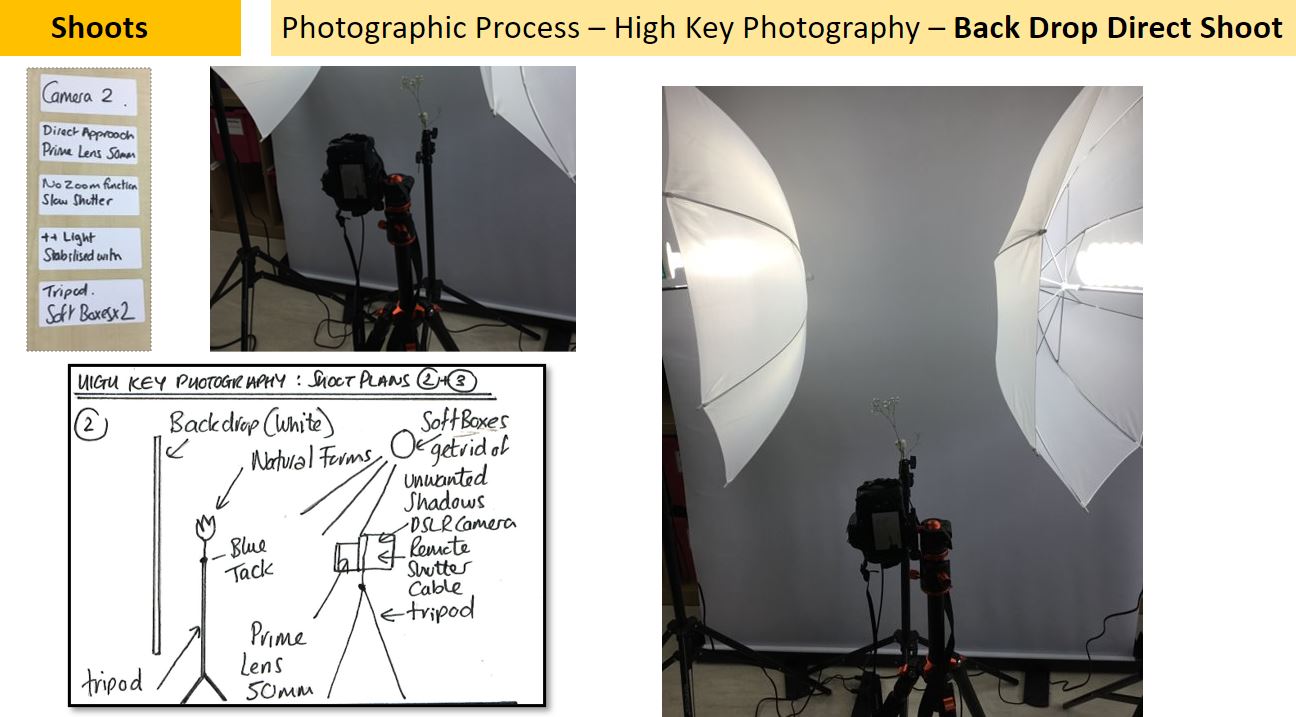
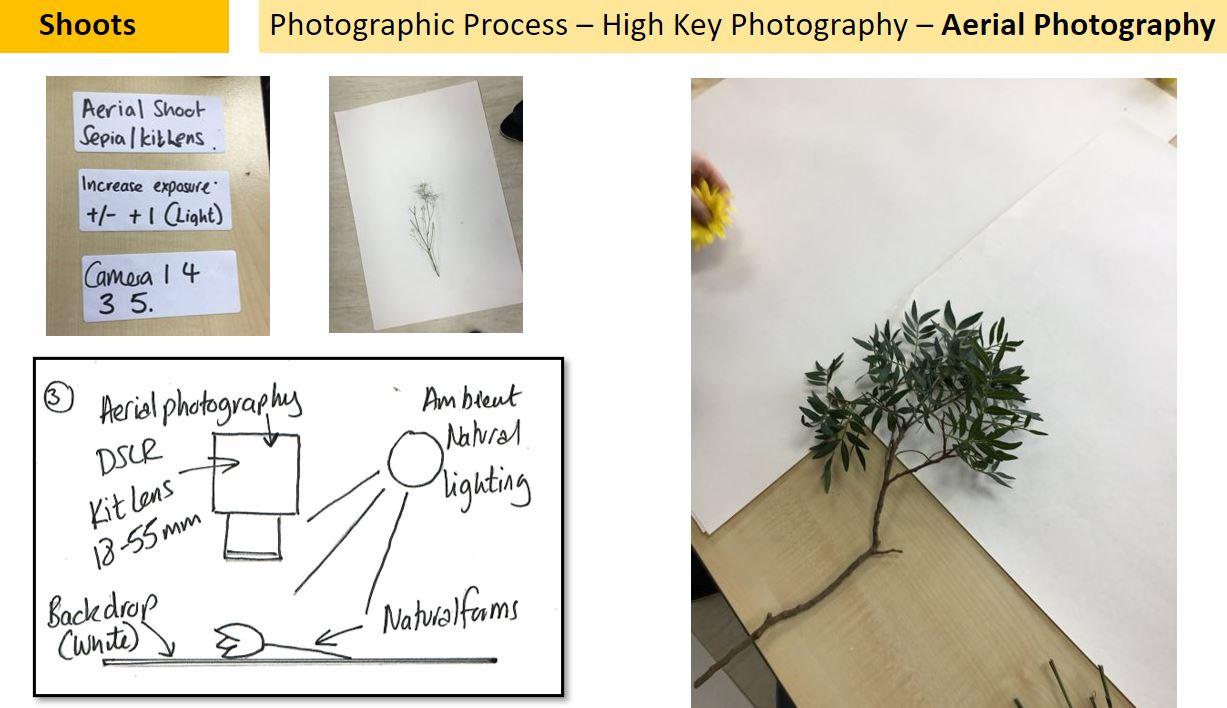
Technical Processes/High Key
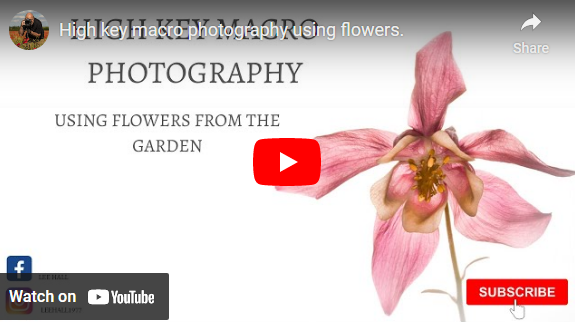
My high key shoot:
|
A high key image consists of primarily of light tones , without dark shadows. High key lighting reduces the lighting ratio in the scene , meaning their is less to contrast between the darker tones and the brighter areas. High key photography also has the synonyms of professionalism, cheerfulness and clarity which I believe is an easier way to sum what what high key photography is. Using high key photography gives your image a unique look. These photos are perfect for creating a happy feeling when the viewer sees the image. If you want to convey a sense of joy , high key lighting is typically the best way to do that. To create a high key image you need to use a bright remote flash at the power of 1/8 which is the most important step. Additionally, you need a shutter speed of 1/50 which would give a clear imag4e of the exact movement without showing shadows. Furthermore, the aperture is f/16 means the image will be a longer focal lens and a larger aperture. Finally, the IOS will be set at a 100 which will complement the shutter speed well.
Equipment needed to make a high key shoot:

|


Karl Blossfeld - Artist research
“IF I GIVE SOMEONE A HORSETAIL HE WILL HAVE NO DIFFICULTY MAKING A PHOTOGRAPHIC ENLARGEMENT OF IT. ANYONE CAN DO THAT. BUT TO OBSERVE IT, TO NOTICE AND DISCOVER OLD FORMS, IS SOMETHING ONLY FEW ARE CAPABLE OF."- Karl Blossfeldt 
Why this video?
I have chosen this video because I truly believe this represents and shows Karls best work as it flies through all this most successful pieces over his lifetime. As we already know about how Karl makes and uses his own cameras but this video shows all his artistic ways and how he shows and presents his work.
|
Why this artist?
I chose this artist because of all his neutral tones blending in together well and the use of abstract art is extremely well presented as all his work blends together in the colour schemes so all his work will look asthetic. He also uses high key photography in this photograph and it is a very successful technique. I also chose Karl due to how Karl was known for his unique and extremely high tech photography. He specialised in macro photography, in order to enlarge his plants and even designed a camera just for this purpose. Karl was also someone who cares more about what he is photographing and what he is showing people over the outcome he will make. furthermore, with the precision of a botanist , blossfield photographed the natural world for scientific purposes which originally came from the modern artist. Who is he? Karl Blossfeld was German photography born in 1865 and died 1935. He lived and worked in berlin on his beautiful close up images on nature. He uses unusual plants to grab attention of the audience. Karl blossfeld is best known for his precise photographs of plants; however he began his careers a sculptor, competing apprenticeships at the ironwork and foundry. Karl was also one of the first photographers to build his own unique camera which was made out of wood and had one metre long bellows. |
Semi analysis / Karl Blossfeld

|
My chosen photographer is called Karl Blossfeldt who is a German photographer who is mostly known for his close up photographs of plants and living things which he described his type of art is "New Objectivity". The image to the left is known as Saxifraga Wilkommiana which was only one of the beautiful images he has taken. Karl cares about his work and final outcomes as he enlarges this plant ten times to get the perfect outcome. This photograph is still life which means it it was stationary while the shoot was taking place. Furthermore, this picture has been taken in a portrait way so it will appear longer instead of wider. In this image it has all neutral colour scheme which is theme I have seen he does in the high key photos because of how the brightness of the flash works well with the neutral colours. The props I can see in this picture is a plant which has been perfectly in the centre which becomes the focal point of the image. Additionally, a camera has obviously been used and a remote flash which times perfectly with the camera to make the background pure white and make the plant edges fade into the background.
|
|
The photographer uses seven elements of art in his work by the colour of the neutral tones and space by the clear surroundings. Additionally, tones was used by the colours fading from the plant into the background however the shape is unusual which makes the photograph more abstract. Finally the last two elements are tone and texture which is obviously shown in the image. In my opinion the strongest element is the shape as the shape is very abstract and you cannot work out if it is a plant. Furthermore, the artist uses the colours well to truly identify the artist and who it is because all his photos are in the same colour scheme. In his photograph he uses pencils , graphite and water colour to add shadows and highlights in the image. In this photograph Karl used black and white as that is the only colour options they had at the time and this is shot with a camera he made himself because at that time they did not have the technology at that time to shoot on a normal camera.
|

|

|
The main focal point if this image is the plant which is the centre of the image so it is made the main point by how all the leaves and branches meet in the middle of the whole photograph. I believe Karl has places the plant in this way to draw attention to the centre and all the details around it which becomes all in line and perfectly the same each side. I think this photography shoot has been taken under natural sunlight and a UV light angled at the side to create a shadow and more dimension. I know this because as the image has a beige tint which is normally shown to be from the natural sunlight. To emulate this I would need to have all the windows wide open trying to capture as much sunlight as possible and have a white UV light angles above while the plant has a piece of pure white paper underneath with multiple books underneath so it is higher up and it is easier for me to get the perfect image and perfectly zoomed in without it being blurry.
|
|
I feel this photograph gives the mood of sadness as the image is cooled toned and has no outstanding points so the image comes across to me as lifeless and plain as nothing stands out to me and all the pictures are the exact same just a different plant. when I emulate this image I will use a dimmer light to capture the depressive feel of this image and the dim colour scheme. The image is showing the dark roots and leafs contrasts the background which is white/beige which makes the plant stand out even more and how the plant seems to look like it is fading into the background makes the centre the main focus point.
|

|

Shoot plan: |
|
The artist that inspired this shoot is Karl Blossfield as I have researched and studied his abstract work and how it is all put together. His use of plants in this abstract way is unique which made me keen to emulate. This shoot will take place early in the morning with all the blinds fully open allowing all the natural light in so the picture will appear brighter. I used the classroom because I can set up a light room to add more light to the image and a backdrop for high key photography. I will use my 250D canon camera and my 18-55mm Lense to achieve all these photos. The high key settings will be the f/22 which is one second shutter speeding then the rest will be the manual settings because it will keep the image clear and stay focused.

|

|
Editing process/ Karl Blossfield
To edit my Karl Blossfeild images i usewd the online editing PIXLR E. When editing my images i focused on three key areas of cropping , adjusting the background and amending levels of the image. Here are some shots of the editing process.
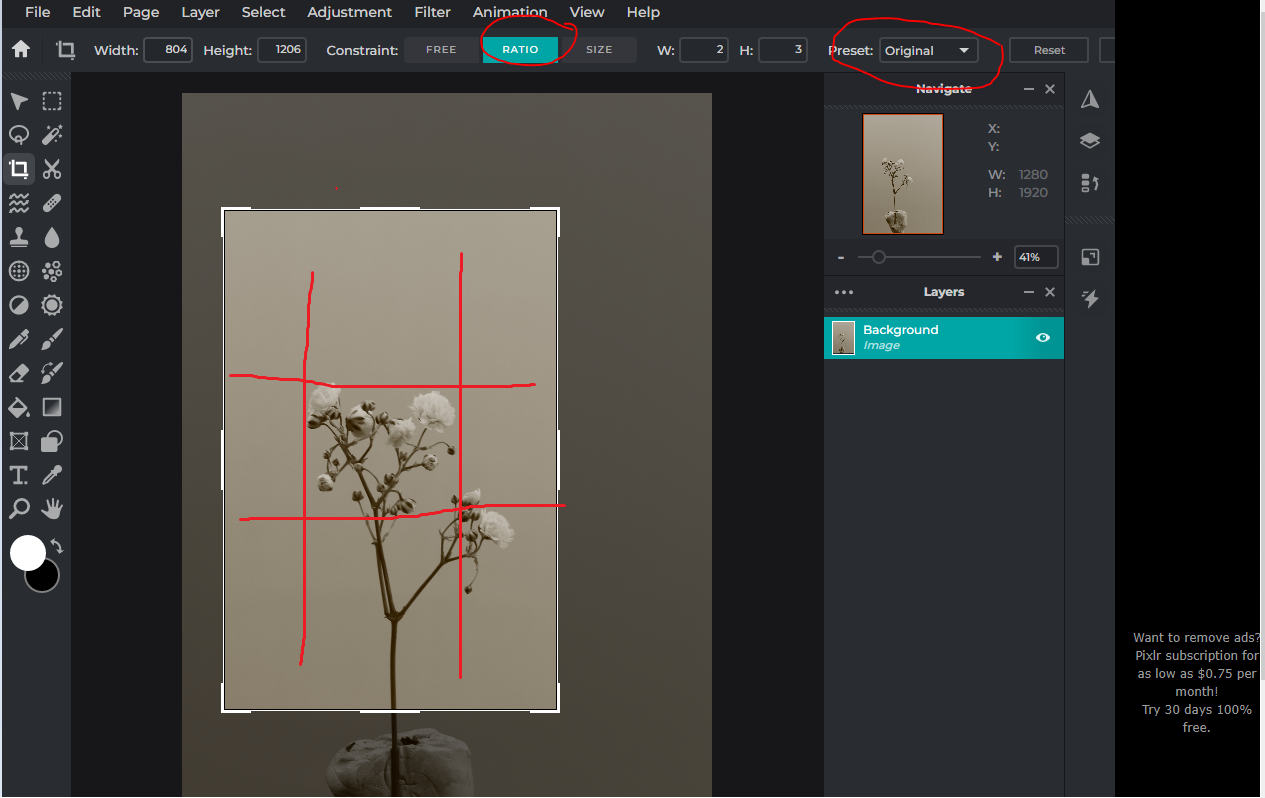
1. Cropping the image using the rule of thirds.
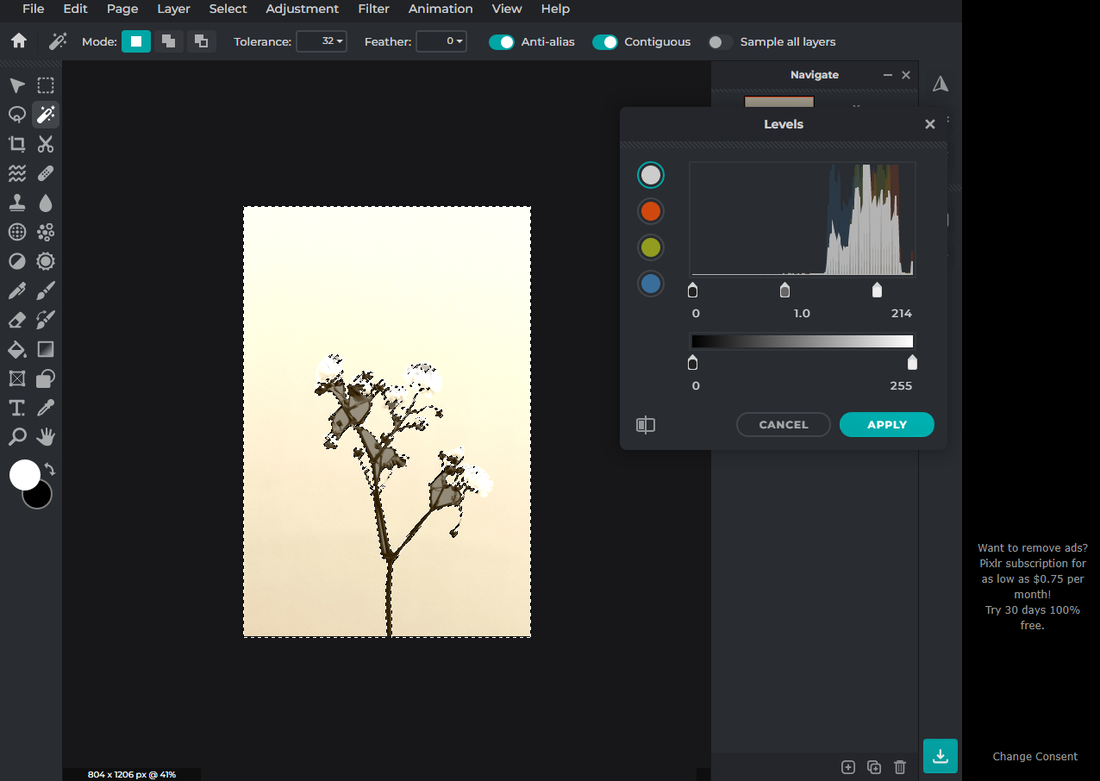
2. using the magic wand tool to select and edit the background.
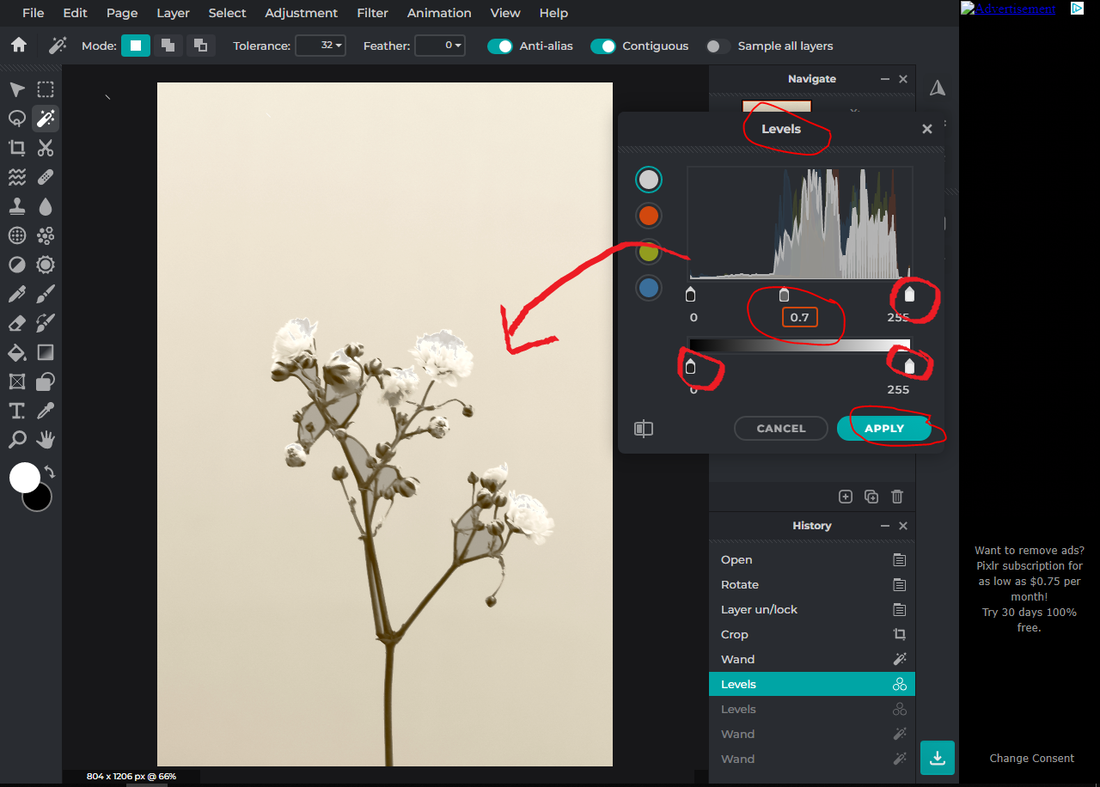
3. Adjusting the levels of the image for the correct range of tones and contrast.

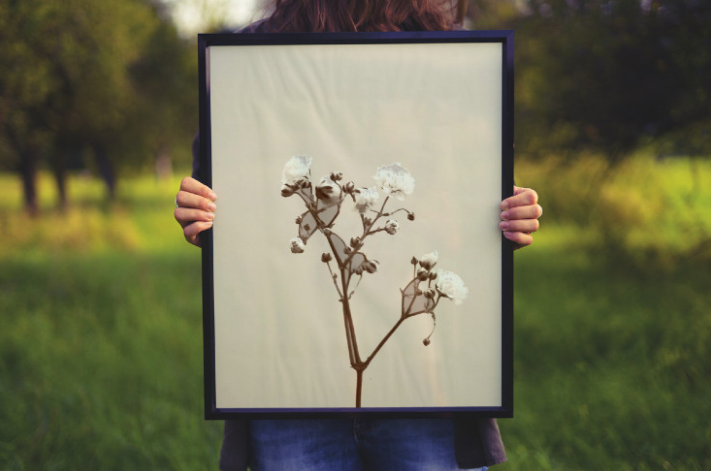
4. Finished result.
9 best images/ Karl Blossfeld shoot


Karl Blossfield / overlay

|
|
Explosion sketchbooks
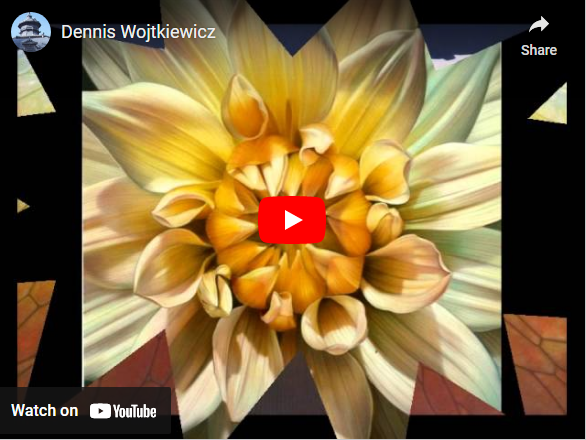
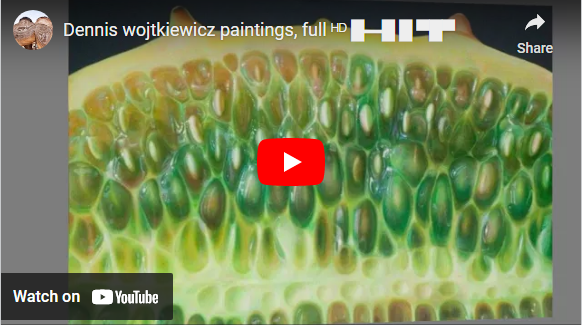
Artist investigation/Dennis Wojtkiewicz

|
I use a Canon EOS 90D camera with a Canon EF 100mm f/2.8 Macro USM fixed lens. The only reason I even know about the technology is because my colleague told me that's what I needed and would be the biggest bang for the buck. The rest of it is all by feel. I have absolutely no photo training. For me that suffices because I'm not hung up on technical stuff. Just looking for ways to capture information for my paintings. Why this artist?
The final artist i will be investigating is Dennis Wojtkiewicz as he is a great artist/photographer who uses all seven elements of art throughout his work. His work differs from others because of how he is a painter but uses photography first to capture the details on the fruit. Dennis is a modern comtempary artist who uses canon cameras to complete his work. However, there are similarities in his use of macro , still life photography , of fruit and style of analytical photography.
Who is he?
Dennis Wojtkiewicz is an American Hyperrealist painter and draughtsman. Wojtkiewicz graduated from Southern Illinois University and is artist associated with the Hyperrealist movement. He is best known for his large scale renderings of sliced fruit and flowers. He was born in 1956 which makes him 67 years of age and he has a notionallity of polish but was born in chicago illinios.
Why this quote?
The quote i have chosen is directly from him which has been sent through an email , explaining all the settings and features he has used on his camera to fully acheive the images he has been successful with today.
|
Why i have chosen this video?
I have chosen this video because of how it showcases Dennises work and how he achieves all the 7 elements of art and how he gest all the hues and tones. This is something i would like to replicate in my editing which will be fully inspired by Wojtkiewicz work. i will also take inspiration from his structure and set up as i believe is a key factor of how he achieves this abstract art.


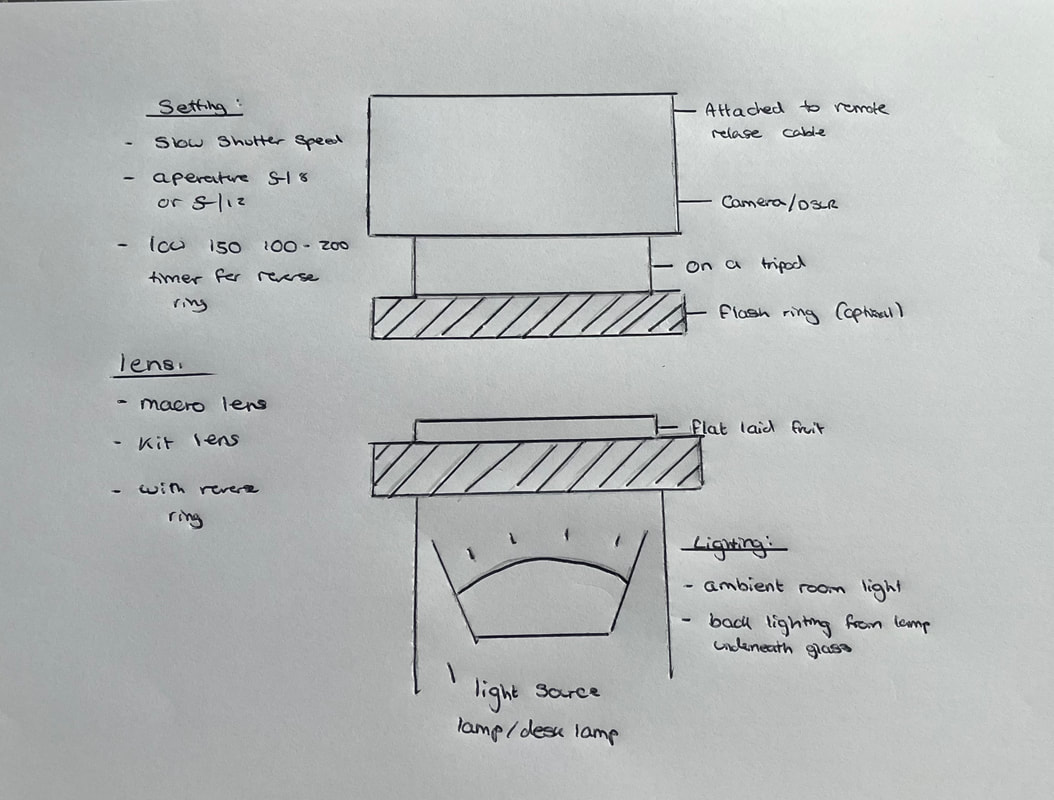
Photographic techniques / Back lighting fruit
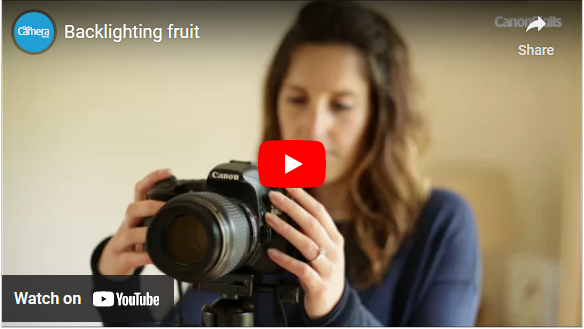
To capture all these details the photographer would have used either a micro lense or a reverse ring. To finalise all this you will need a box light or a glass sheet with a light source such as a lamp underneath. Finally , use a tripod to keep the camera from not shaking to achieve a clear image.
|
Backlighting photography emphasises the depth behind the subject and gives images a greater sense of place. Backlighting can produce a dramatic contrast between the subject and the background. This can be especially effective technique when shooting outdoor portraits. Backlighting is used when you place your subject in front of the light source. For example the sun is setting and you place your subject in front of the sunset where the light is coming in from behind the subject. Using this composition technique will really change the look of the photo. Additionally, backlighting is a critical element determining the quality of the image produced.Not only does it determine the brightness of this picture, it also affects the colour accuracy. For example, if a white light has a yellow tinge , red pixels will appear to be slightly orange.
|
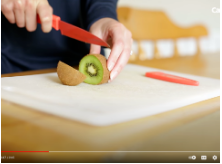
Step one: Cut your fruit into thin pieces to make it look transulcent , so the colours will blend together and will not look over exposed.
|
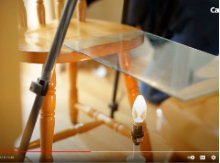
Step two: Put the cut fruit on top of a glass sheet , with a light source directly underneath the fruit.
|
Step three: Adjust the camera settings and place onto the tripod at an aerial view.
|

Step four: Now finally use a remote release cable to achieve a successful Dennis Wojtkiewicz photograph.
|
Shoot plan: Dennis Wojtkiewicz
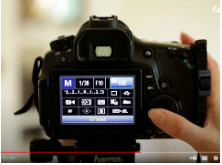
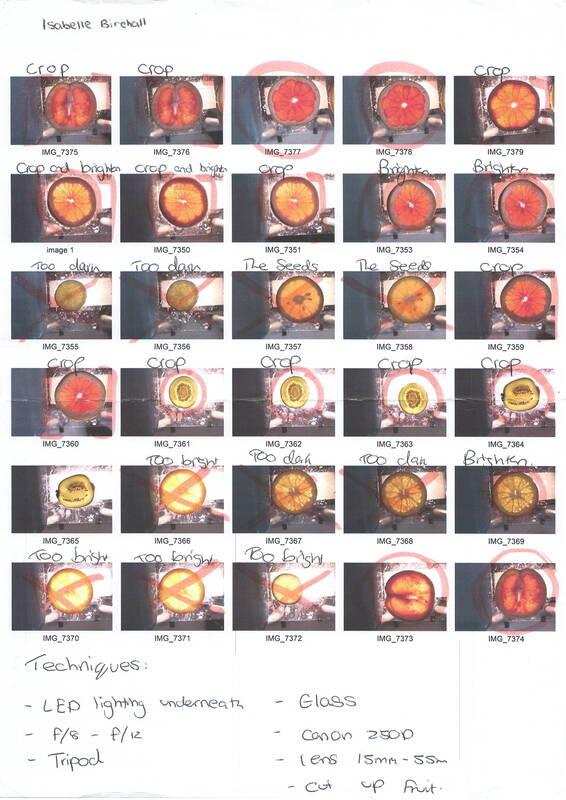
This shoot has been inspired by Dennis Wojtkiewicz, he uses backlighting directly underneath which shines through the fruit making it transparent.I used this technique to emulate his work and it showed to be extremely effective as the light was not that bright and it created an amazing outcome. With the lighting and the glass used to hold the fruit on it creates a perfect set up to copy Dennis's work .During this shoot I will use a range of fruits such as oranges, lemons , kiwis and these fruits will be cut up into this pieces so it can be fully transparent so all the light can come through just like Dennis work. For this shoot I used my canon 250D with the 18mm-50mm lens to capture these images I also used a reverse ring to get all the micro details , for the camera settings I will be using f/8-f/12 and a low ISO for a better image quality , with a low shutter speed to avoid the camera shake.
Post editing / Dennis Wojtkiewicz
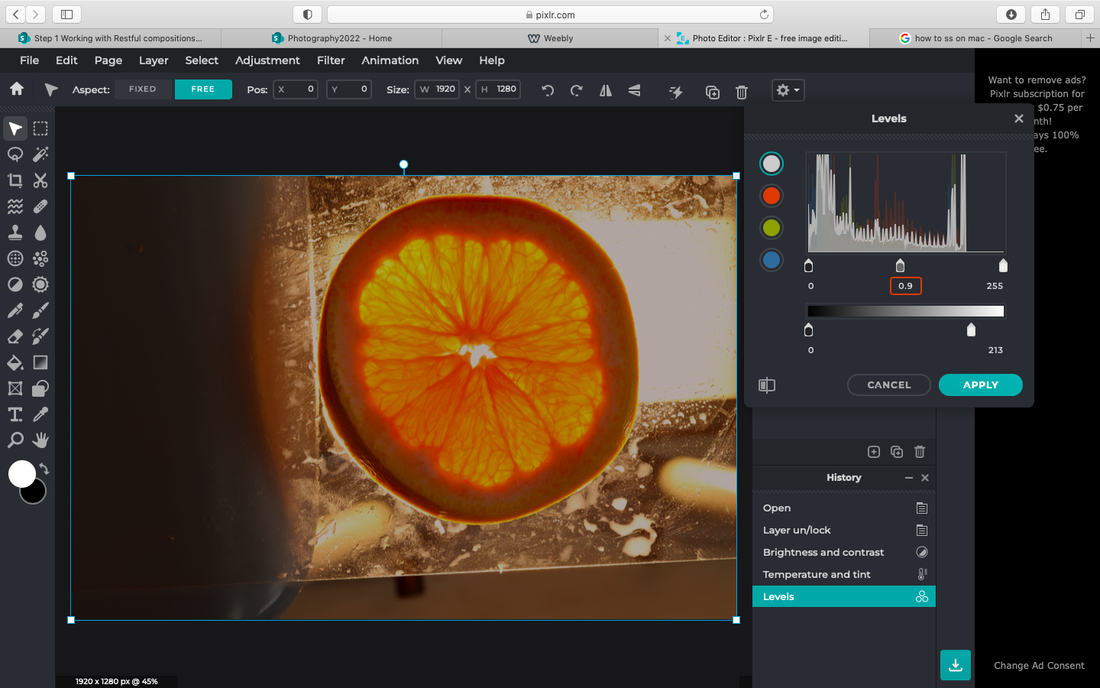
Editing step 1: The first step I did was enhance all the features in the photo. The enhancement I did was changing the levels which changed the lighting overall and deepen the colour in the image.

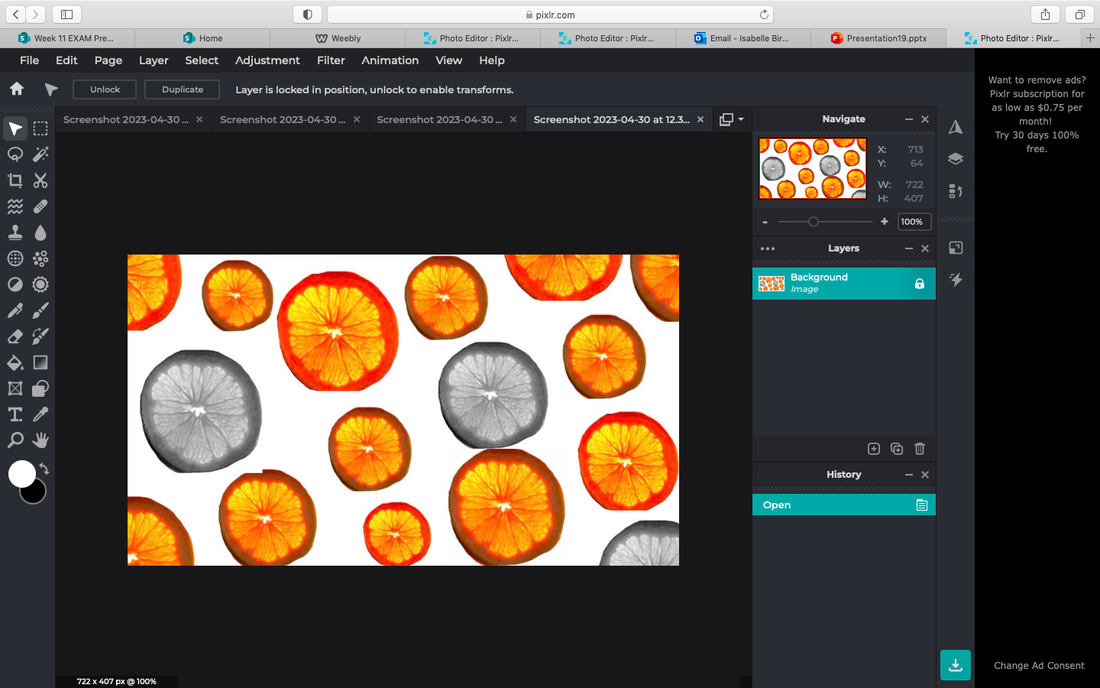
Editing step 3: Furthermore, in PIXLR I used the duplicate tool to add more of them and the flipping tool to flip and change them into the right size I needed to create this outcome.
|
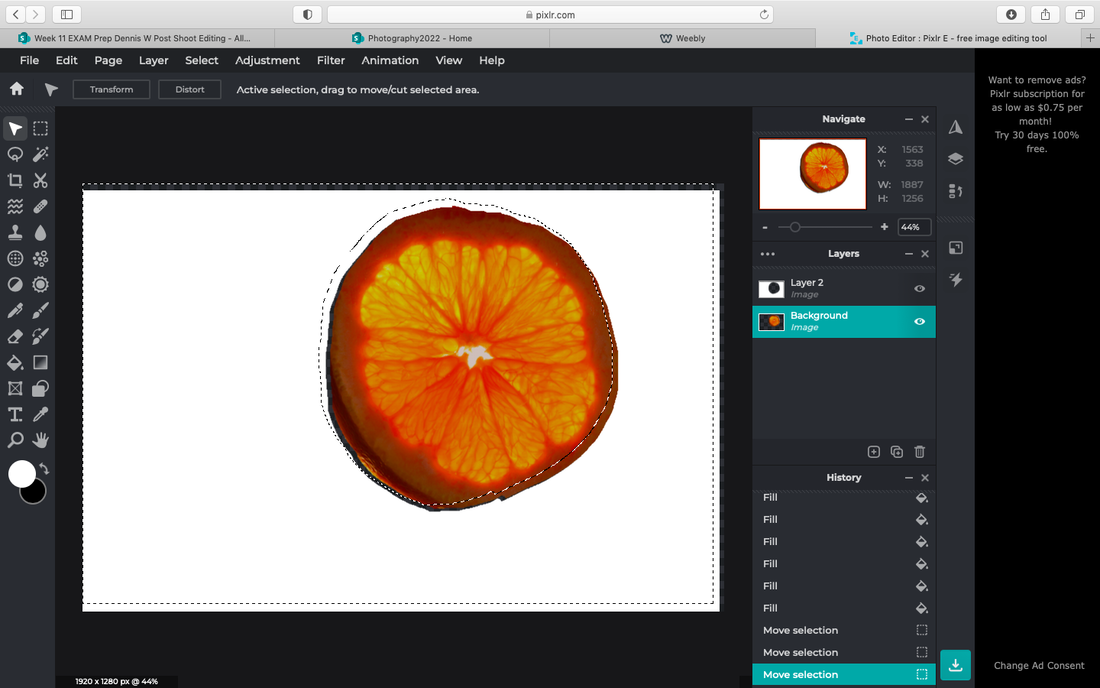
Editing step 2: In this screenshot I used the lasso tool to outline the fruit in this image to make it the only thing in the picture. Additionally, I used the painting tools too clear the background and make it completely white.
Editing step 4: Finally, I changed the colour on a few and used the brightness and contrasting tool to make sure they stand out which gave it a pop of colour and this is how I achieved my final image.
|
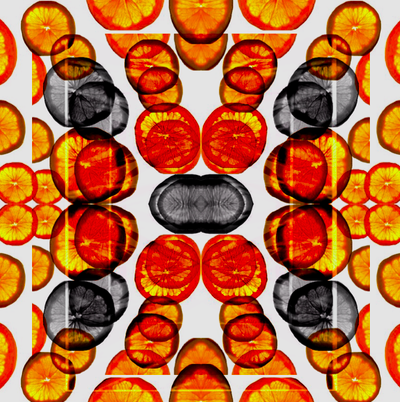
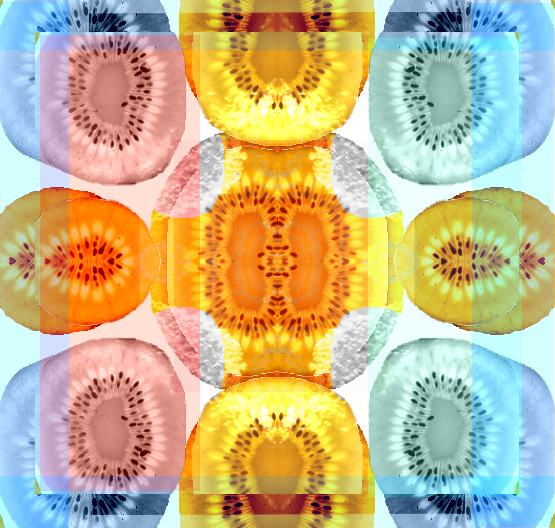
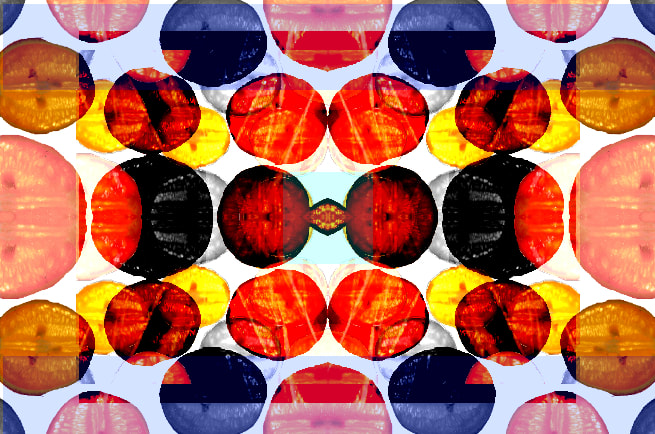
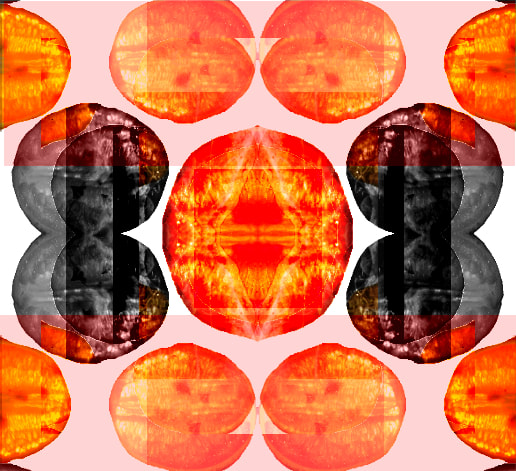
Rotational designs / Dennis Wojtkiewicz
Using rotational symmetry and the work of Horst.P Horst I have created a series of rational designs using the abstract elements of shape, form , tone and harmony. I will develop these further while using PIXLR.


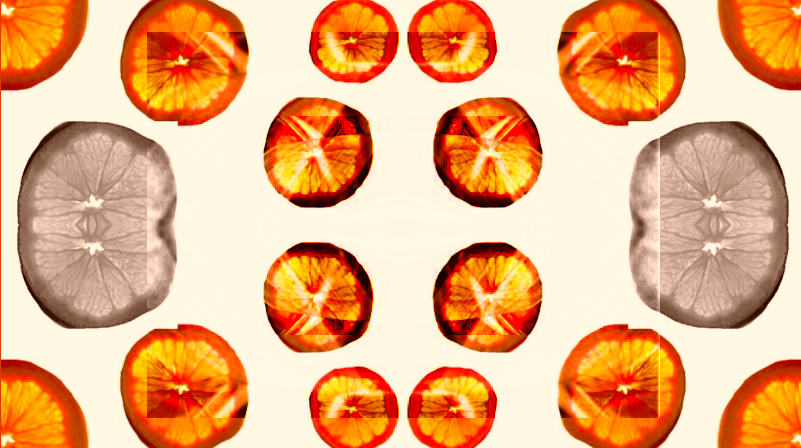

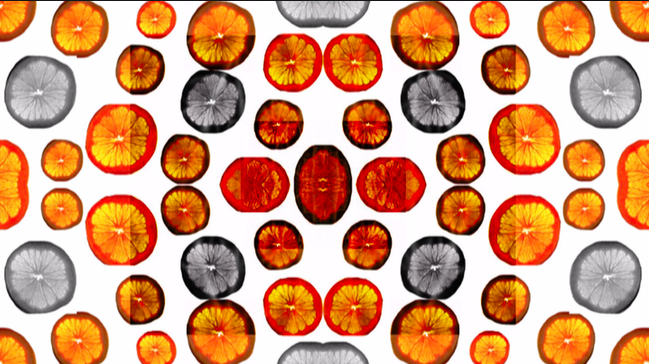
Rotational designs/Dennis Wojtkiewicz/ Mock work


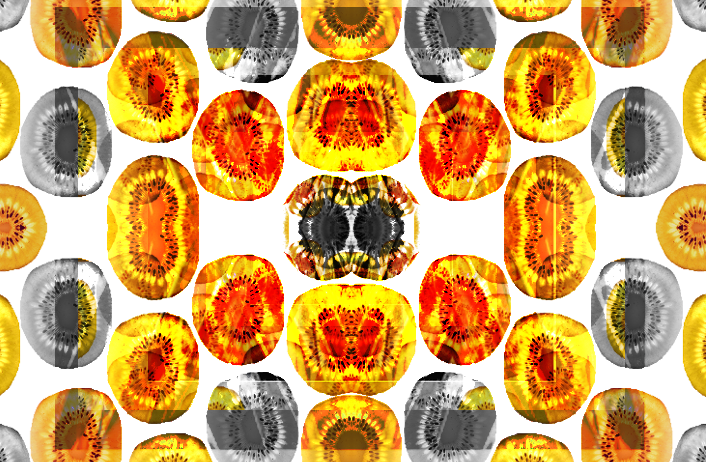
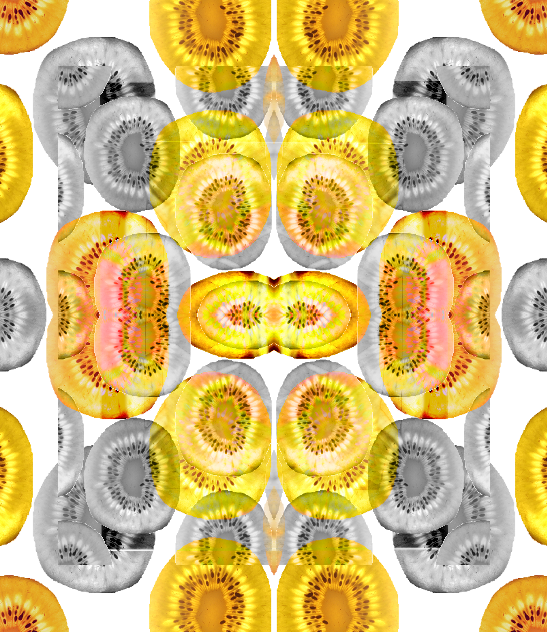
Rotational designs/Dennis Wojtkiewicz / Mock work


Collage/ Mock Exam
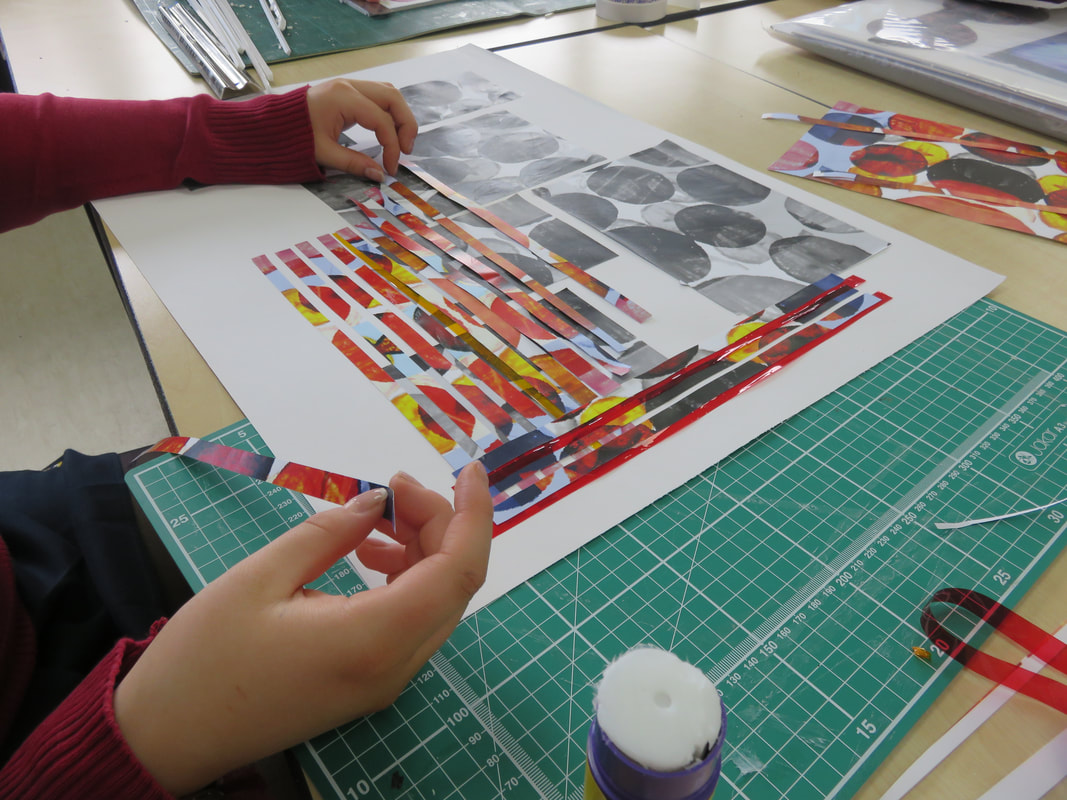
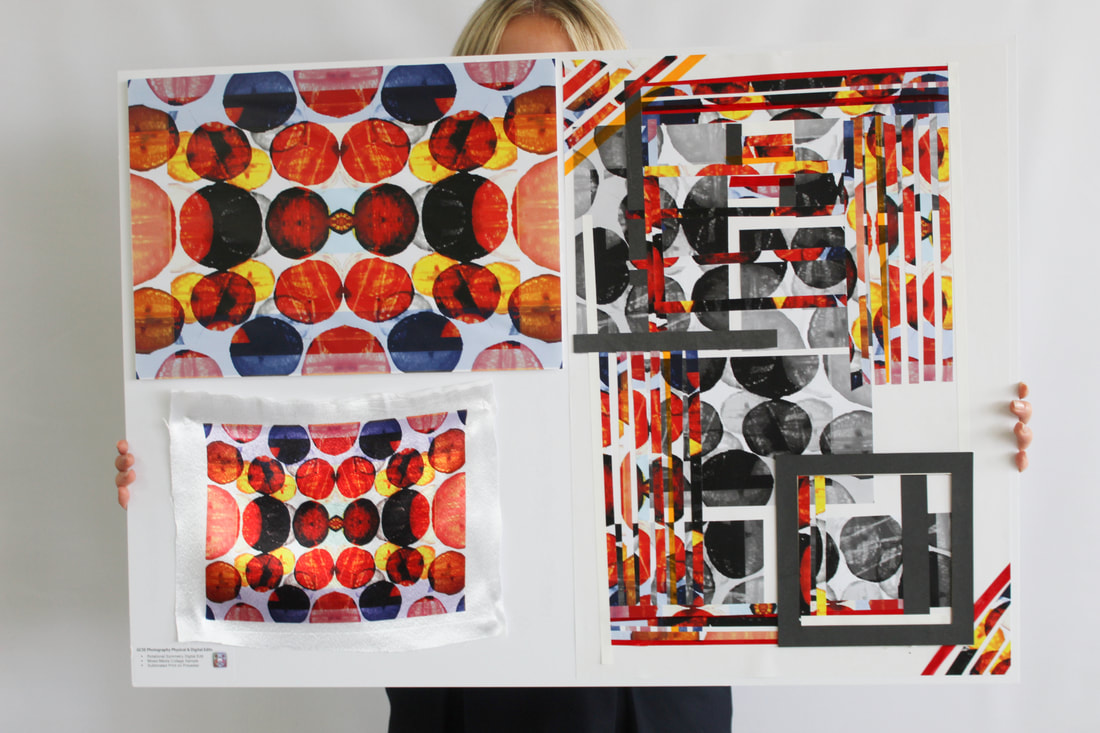
Abstract Nature/ Hand Manipulation Sample Boards
Evaluation / Abstract Nature
Throughout this project i have developed my understanding of abstract photography by exploring the theme of nature. Prior to photography I had no idea how to work and function a camera and I had no knowledge of digital editing. However, now I am confident that I know how to work the camera and how to edit photos in a professional way. Some key skills I have learnt are ICM's, how to photograph in monochromatic, shallow depth of field and many more such as high and low key photography , cyanotypes , rotational symmetry while editing and overlays. In particular , the way to effectively use the camera to get the greatest outcome I can.
Throughout this course I have further my understanding of abstract nature and her to emulate and identify them. In this theme I have varied from leafs from bushes to a full professional shoot including professional cameras and exotic fruit. By having these two opposing shoots I can say I fully know how a professional shoot runs and what makes the shoot successful. In all my photography shoots I have used all the seven elements of art which is line, shape, texture, form , tone ,colour and space, furthermore I have also used the concepts of balance, rhythm , pattern , emphasis, contrast, unity and movement which helped me understand how to achieve the best possible outcomes. Furthermore , the choice of black and white in abstract nature draws full attention to the details such as the form , texture and shape which really comes forward in a image when then main element of colour gets taken away.
The artist i researched was Edward Weston.Edward was an artist that was famous for a picture of a pepper called pepper no.9. Edward used old techniques and an old camera to turn everyday objects into perfectly toned photographs. Initially i researched his work to understand his unique way that he captures his pictures and understand where he gets his inspiration from. In Edward Westons work he uses a lot of form and tone as no colour is used as he photographs in monochrome so the tones and forms are crucial to get the outcomes he has. Throughout studying the artists of Edward Westons , i was able to explore concepts of line, shape and harmony in my own examples and outcomes to overall emulate his work to make my own turn on it. I emulated his work by letting lots of natural light with a plain black background which will draw all the attention to the fruit which will need to be elevated which will overall make it easier to zoom in and make it a clear image. Inspired by their work , I created a series of emulations by photographing them by different angles. I investigated the technical processes of all the different camera settings to achieve his style of photography .His work helped me explore the theme of abstract nature by how everyday nature and objects can be photographed and shown in a completely different way. Edward Westons work helped me understand the theme of abstract nature because it showed me that abstract nature doesn't always have to be about the colours of the flowers and the colours of nature when Edward showed true abstract nature in black and white.
Another artist I have researched is Anna Atkins. Anna Atkins inspired me to emulate her work because she mixed photography and art together to make the cyanotypes. It also inspired me because of the cyanotypes and how it was affordable and easy to make so I know I will most likely have a good outcome. Initially I researched the work of Anna to understand how such an old method of photography could make such detailed and beautiful outcome. The elements of photography that was used in her cyanotypes was colour that evolved over time due to the sunlight and the element of forms as the leaves and nature left on the acetate left a trace of the plants form. Through studying this artist I was able to explore concepts of line, shape and harmony in my own photography examples which is shown on my website.To try and match her work and photographs I had to use the technique of light and using it to the pictures advantage and how we got the negatives of the image to come through. The only equipment that was used was the acetate , paint and the leaf which was all placed carefully onto of each other. Inspired by her work , I created a series of emulations by copying the type of leafs she used and the way she placed onto the acetate. I investigated the technical processes of exposing the acetate which will leave clean outlines of the plant. Her work helped me explore the theme of abstract nature by using real nature in her work make it look more abstract and genuine. her work links to the project I have been looking at because her work is abstract because most of the time it is not fully showing the image or just faded which overall links to abstract nature. Her work helped me understand the theme of abstract nature because it isn't always about the setting on the camera its about the nature infant of you.
Furthermore, my third artist I have researched is Man Ray who was an artist that works in the media who spent. most of his photography career in France. She uses photograms which are shadow like images made on paper without the use of a negative or a camera. It is made by placing objects between light sensitivity paper or film and a light source. Initially I researched the work of photograms and found out that she is a well known artist for using this. The elements used for her work is mostly tone as the tone is seriously important because it is how the pictures forms due to the water it is put in. Through studying this artist, I was able to explore concepts of line, shape and harmony in my own photography examples to emulate his work. The technical processes used I her work is the way we us the water and the tray to bring out the negatives in at the image. His work helped me explore abstract nature by trying another method of creating an image and not just taking one. It helped me understand how their are multiple other ways to get a photograph.
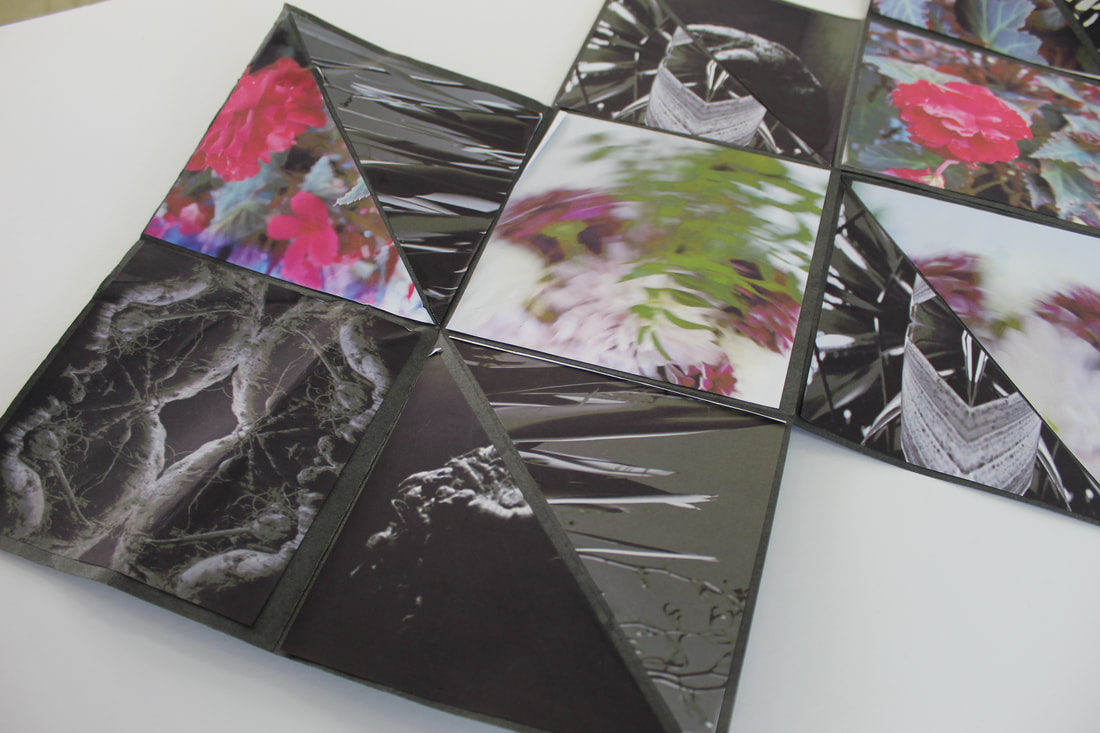
To further develop the abstraction from earlier I got inspired by the work of Horst.p.Horst and decided to try and create my own idea of rotational symmetry like he did. I used nine images from the monochromatic shoot and nine images from my cyanotypes to create a lovely outcome with a twist. I felt that my outcomes in rotational symmetry was apart of my best work because I used the photos that I know would form the best images. Horst.p.Horst was a fashion photographer who used rotational symmertry to create new patterns. His book ,patterns from nature, has inspired me to create my won rotational symmertry pattern using the work i have done so far.
Additionally, another artist that i have researched is Karl Blossefeld. Karl was a German photographer that lived in berlin all his life and used his life to photograph plants to make abstract art. I was inspired by his work because it was all neutral toned which blended together really well but at the same time showed the contrast between the cool tones of the plant and the warm tones of the background. The elements of photography Karl uses are shape and colour mostly because he uses plants that don't look like they are from nature and uses them to make the photo abstract. Through studying this artist ,i was able to explore concepts of line , shape and harmony in my own photography. I emulated his work using high key photography to try and match the examples of Karls. When doing this I used a lot of artificial light to make the background look more white and make the plant in front come out more clear. Furthermore, I increased the shutter speed to f/8 to make the camera take the picture faster which overall makes the image clearer. Inspired by his work , I created a series of pictures using all his techniques which came out to be a very good outcome as it emulated his work well. I investigated the technical processes of the light against the white paper to brighten it up and it is show to be seriously effective. His work helped mr explore abstract nature as it was shown me that pictures of nature doesn't have to be all colourful and all over the place and it can be all clean and neat with a colour pattern. His work helped me further understand that there is more than one way to explore abstract nature.
Finally, the last artist I have studies is Dennis Wojtkiewicz. He was an artist that has stood out to me as his work starts off as a photograph but he transforms them into a painting with a lot detail to keep the same. Dennis is one of the more recent artist as he uses real cameras and more modern styling of editing which I think his easier and more effective to try and emulate because you can use exactly the same camera and editing style as him. He inspired me to emulate his work because all his work is highly detailed and presented in a beautiful way as he keeps all his backgrounds the same colour and tone. Initially, I researched his work to try and copy his style but later discovered that his photos used as rotational symmetry will form a abstract art that is perfectly put together. The elements of photography he has used is colour and texture the use of colour is always bright and stands out as it needs to be made the main focal point of the image. Additionally, the use of texture is shown inside the fruit which gets brought to more focus as the light from underneath makes sure it shines through. Throughout studying this artist, I was able to explore concepts of line , shape and harmony in my own examples. I emulated his work by using the same technical processes of the artificial light and glass plane to make my own turn on it and created it as a rotational which is shown above. His work explores the theme of abstract nature by the way he presents the fruit and all its textures to the audience. This work was different from the rest as the theme of abstract was not fully presented as it was obvious what it was and what was presented In the picture.
I believe my most successful work was my most recent artists which were Karl Blossfeld and Dennis Wojtkiewicz as the artists were both very similar in style. In both outcomes of my work I can see that the lay out and framing was used very well and I believe I used their lay out throughout my work. Additionally, I think the lighting choices I made was well done as both of my final edits did not come out as over exposed , blurry or under exposed and they came out perfectly showing all the details I needed. Furthermore, from a creators perspective I believe the lay out and the presentation of my work for both was presented ted in a well shown and professional manner which overall sets a good impression for the work underneath. Throughout all abstract nature I believe I have shown clear understanding, as I come across that I know `lot about the artists and showed that by how I presented their work. I have also put a lot of effort into researching all about the artists to further my understanding to overall show a good understanding of their work and how they got it.
However, I believe the area of improvements I need to work on is to further my understanding of the camera and all its functions as I have been using mostly towards the start of abstract nature the manual settings which will not always take the photo at its clearest view. In the future I need to learn how to properly understand how to find the best settings for right style of work I am looking at. `Furthermore, I believe in my next subject I need to add more techniques to my contact sheets as later on it will help me overall improve and explain how I got the pictures I have. Finally, the main thing I need to improve on is my annotations to the artists pictures
by me adding more notations to their work it will show me later on where the light and shadows should hit and where the details should be brightened.
Throughout this course I have further my understanding of abstract nature and her to emulate and identify them. In this theme I have varied from leafs from bushes to a full professional shoot including professional cameras and exotic fruit. By having these two opposing shoots I can say I fully know how a professional shoot runs and what makes the shoot successful. In all my photography shoots I have used all the seven elements of art which is line, shape, texture, form , tone ,colour and space, furthermore I have also used the concepts of balance, rhythm , pattern , emphasis, contrast, unity and movement which helped me understand how to achieve the best possible outcomes. Furthermore , the choice of black and white in abstract nature draws full attention to the details such as the form , texture and shape which really comes forward in a image when then main element of colour gets taken away.
The artist i researched was Edward Weston.Edward was an artist that was famous for a picture of a pepper called pepper no.9. Edward used old techniques and an old camera to turn everyday objects into perfectly toned photographs. Initially i researched his work to understand his unique way that he captures his pictures and understand where he gets his inspiration from. In Edward Westons work he uses a lot of form and tone as no colour is used as he photographs in monochrome so the tones and forms are crucial to get the outcomes he has. Throughout studying the artists of Edward Westons , i was able to explore concepts of line, shape and harmony in my own examples and outcomes to overall emulate his work to make my own turn on it. I emulated his work by letting lots of natural light with a plain black background which will draw all the attention to the fruit which will need to be elevated which will overall make it easier to zoom in and make it a clear image. Inspired by their work , I created a series of emulations by photographing them by different angles. I investigated the technical processes of all the different camera settings to achieve his style of photography .His work helped me explore the theme of abstract nature by how everyday nature and objects can be photographed and shown in a completely different way. Edward Westons work helped me understand the theme of abstract nature because it showed me that abstract nature doesn't always have to be about the colours of the flowers and the colours of nature when Edward showed true abstract nature in black and white.
Another artist I have researched is Anna Atkins. Anna Atkins inspired me to emulate her work because she mixed photography and art together to make the cyanotypes. It also inspired me because of the cyanotypes and how it was affordable and easy to make so I know I will most likely have a good outcome. Initially I researched the work of Anna to understand how such an old method of photography could make such detailed and beautiful outcome. The elements of photography that was used in her cyanotypes was colour that evolved over time due to the sunlight and the element of forms as the leaves and nature left on the acetate left a trace of the plants form. Through studying this artist I was able to explore concepts of line, shape and harmony in my own photography examples which is shown on my website.To try and match her work and photographs I had to use the technique of light and using it to the pictures advantage and how we got the negatives of the image to come through. The only equipment that was used was the acetate , paint and the leaf which was all placed carefully onto of each other. Inspired by her work , I created a series of emulations by copying the type of leafs she used and the way she placed onto the acetate. I investigated the technical processes of exposing the acetate which will leave clean outlines of the plant. Her work helped me explore the theme of abstract nature by using real nature in her work make it look more abstract and genuine. her work links to the project I have been looking at because her work is abstract because most of the time it is not fully showing the image or just faded which overall links to abstract nature. Her work helped me understand the theme of abstract nature because it isn't always about the setting on the camera its about the nature infant of you.
Furthermore, my third artist I have researched is Man Ray who was an artist that works in the media who spent. most of his photography career in France. She uses photograms which are shadow like images made on paper without the use of a negative or a camera. It is made by placing objects between light sensitivity paper or film and a light source. Initially I researched the work of photograms and found out that she is a well known artist for using this. The elements used for her work is mostly tone as the tone is seriously important because it is how the pictures forms due to the water it is put in. Through studying this artist, I was able to explore concepts of line, shape and harmony in my own photography examples to emulate his work. The technical processes used I her work is the way we us the water and the tray to bring out the negatives in at the image. His work helped me explore abstract nature by trying another method of creating an image and not just taking one. It helped me understand how their are multiple other ways to get a photograph.
To further develop the abstraction from earlier I got inspired by the work of Horst.p.Horst and decided to try and create my own idea of rotational symmetry like he did. I used nine images from the monochromatic shoot and nine images from my cyanotypes to create a lovely outcome with a twist. I felt that my outcomes in rotational symmetry was apart of my best work because I used the photos that I know would form the best images. Horst.p.Horst was a fashion photographer who used rotational symmertry to create new patterns. His book ,patterns from nature, has inspired me to create my won rotational symmertry pattern using the work i have done so far.
Additionally, another artist that i have researched is Karl Blossefeld. Karl was a German photographer that lived in berlin all his life and used his life to photograph plants to make abstract art. I was inspired by his work because it was all neutral toned which blended together really well but at the same time showed the contrast between the cool tones of the plant and the warm tones of the background. The elements of photography Karl uses are shape and colour mostly because he uses plants that don't look like they are from nature and uses them to make the photo abstract. Through studying this artist ,i was able to explore concepts of line , shape and harmony in my own photography. I emulated his work using high key photography to try and match the examples of Karls. When doing this I used a lot of artificial light to make the background look more white and make the plant in front come out more clear. Furthermore, I increased the shutter speed to f/8 to make the camera take the picture faster which overall makes the image clearer. Inspired by his work , I created a series of pictures using all his techniques which came out to be a very good outcome as it emulated his work well. I investigated the technical processes of the light against the white paper to brighten it up and it is show to be seriously effective. His work helped mr explore abstract nature as it was shown me that pictures of nature doesn't have to be all colourful and all over the place and it can be all clean and neat with a colour pattern. His work helped me further understand that there is more than one way to explore abstract nature.
Finally, the last artist I have studies is Dennis Wojtkiewicz. He was an artist that has stood out to me as his work starts off as a photograph but he transforms them into a painting with a lot detail to keep the same. Dennis is one of the more recent artist as he uses real cameras and more modern styling of editing which I think his easier and more effective to try and emulate because you can use exactly the same camera and editing style as him. He inspired me to emulate his work because all his work is highly detailed and presented in a beautiful way as he keeps all his backgrounds the same colour and tone. Initially, I researched his work to try and copy his style but later discovered that his photos used as rotational symmetry will form a abstract art that is perfectly put together. The elements of photography he has used is colour and texture the use of colour is always bright and stands out as it needs to be made the main focal point of the image. Additionally, the use of texture is shown inside the fruit which gets brought to more focus as the light from underneath makes sure it shines through. Throughout studying this artist, I was able to explore concepts of line , shape and harmony in my own examples. I emulated his work by using the same technical processes of the artificial light and glass plane to make my own turn on it and created it as a rotational which is shown above. His work explores the theme of abstract nature by the way he presents the fruit and all its textures to the audience. This work was different from the rest as the theme of abstract was not fully presented as it was obvious what it was and what was presented In the picture.
I believe my most successful work was my most recent artists which were Karl Blossfeld and Dennis Wojtkiewicz as the artists were both very similar in style. In both outcomes of my work I can see that the lay out and framing was used very well and I believe I used their lay out throughout my work. Additionally, I think the lighting choices I made was well done as both of my final edits did not come out as over exposed , blurry or under exposed and they came out perfectly showing all the details I needed. Furthermore, from a creators perspective I believe the lay out and the presentation of my work for both was presented ted in a well shown and professional manner which overall sets a good impression for the work underneath. Throughout all abstract nature I believe I have shown clear understanding, as I come across that I know `lot about the artists and showed that by how I presented their work. I have also put a lot of effort into researching all about the artists to further my understanding to overall show a good understanding of their work and how they got it.
However, I believe the area of improvements I need to work on is to further my understanding of the camera and all its functions as I have been using mostly towards the start of abstract nature the manual settings which will not always take the photo at its clearest view. In the future I need to learn how to properly understand how to find the best settings for right style of work I am looking at. `Furthermore, I believe in my next subject I need to add more techniques to my contact sheets as later on it will help me overall improve and explain how I got the pictures I have. Finally, the main thing I need to improve on is my annotations to the artists pictures
by me adding more notations to their work it will show me later on where the light and shadows should hit and where the details should be brightened.
